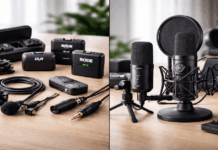
Condenser microphones are popular for home video, streaming, voiceovers, podcasts, and music because they can sound clear and detailed.
They also create confusion because the final sound depends on more than the microphone itself. Room noise, mic distance, gain, stands, pop filters, and recording habits all affect the result.
These myths and truths will help home creators use condenser microphones with more confidence and fewer expensive mistakes.
Start With the Room, Not the Mic
A condenser microphone can capture a strong voice, but it can also capture a messy room. This is why some creators feel disappointed after buying a mic that looked great in reviews.
The mic may be working correctly, but the space around it may be too loud or reflective. Choosing well starts with understanding where you record most often.
Myth: Condenser Mics Are Always Better Than Dynamic Mics
Many beginners assume a condenser mic is automatically more professional because it is more sensitive. That sensitivity can be useful, but it can also pick up keyboard noise, fans, traffic, and room echo.
In a normal bedroom or office, a dynamic mic used close to the mouth may sound cleaner. Better does not mean more sensitive; it means more suitable for the room and recording style.
Truth: The Best Mic Matches Your Space
A condenser mic works best when the room is quiet enough to support it. If you can control noise and stay at a steady distance, it can capture a natural and present voice.
If the room is noisy or echoey, a dynamic mic may be the more practical choice. The goal is not to own the most impressive mic, but to get a sound you can repeat.
Keep Gear Simple and Useful
Many creators think condenser microphones require a full studio chain. In reality, a stable setup with clean levels often matters more than expensive equipment.
Interfaces, stands, mounts, and filters should solve real problems, not make the setup harder to use. A simple chain that works every day is better than a complicated one that creates new mistakes.
Also Read: Best Microphones for Zoom, Calls, and Online Meetings
Myth: You Need a Very Expensive Audio Interface
A costly interface is not required for most home voice work. Many entry-level interfaces already provide stable phantom power, headphone monitoring, and clean enough gain for simple recording.
If the mic is too far away or the room is too noisy, a better interface will not fix the real issue. Expensive gear can even make bad placement and room noise more obvious.
Truth: A Basic Interface Is Often Enough
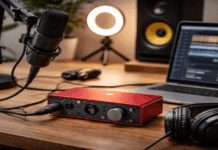
For an XLR condenser, look for an interface with 48V phantom power, a gain knob, and a headphone output. Then spend time learning where your voice peaks and how close you should speak.
Clean input levels prevent clipping, hiss, and uneven takes. Once you outgrow the interface, you will know the exact reason instead of upgrading randomly.
Control Reflections Before Chasing Studio Treatment
Condenser microphones do not need a perfect studio, but they do need basic control. Hard walls, bare floors, empty desks, and nearby windows can reflect sound back into the mic.
These reflections make voices sound boxy, distant, or sharp. Small changes in placement can improve recordings before you buy acoustic foam.
Myth: Condenser Mics Are Useless Without Foam Panels
This myth makes beginners think they cannot record until every wall is treated. Foam panels can reduce some reflections, but they do not block traffic, neighbors, or outside noise.
Random foam placement may also miss the reflection points that actually affect the mic. A better first step is to record closer, lower the gain, and move away from noisy surfaces.
Truth: Smart Placement Can Do a Lot
Place the mic where your voice is strong and the room is less noticeable. Curtains, rugs, bookshelves, fabric chairs, and blankets can soften nearby reflections.
Aim the mic away from fans, windows, and noisy computers when possible. These simple controls often improve clarity more than covering walls without a plan.
Use this quick setup check before recording:
- Keep the mic close enough for a strong voice signal.
- Lower gain instead of boosting a distant voice.
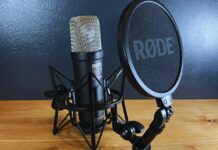
- Use a pop filter for harsh P and B sounds.
- Place the mic on a stable stand or boom arm.
- Record a short test before starting the full take.
Understand Sensitivity, Detail, and USB Mics
Condenser microphones are often praised for detail, but detail does not come from sensitivity alone. It comes from the right distance, stable gain, and controlled bursts of air.
USB condensers can also sound good when used with the same care as XLR mics. The format matters less than the habits behind the recording.
Myth: More Sensitivity Means More Useful Detail
A sensitive mic can capture detail, but it can also capture problems. If gain is too high, the mic may bring up hiss, computer hum, mouth noise, and room echo.
Some creators stand too far away, then increase gain to make the voice louder. This usually makes the recording thinner, noisier, and less present.
Truth: Detail Comes From Clean Technique
Stay close enough for your voice to sound full without overloading the mic. Set gain so normal speech stays clear and louder moments do not clip.
Use a pop filter and speak slightly across the capsule to reduce harsh bursts. If the recording needs more brightness, adjust mic angle first and use light editing only after capturing a clean take.
Myth: USB Condenser Mics Cannot Sound Professional
USB mics are sometimes dismissed because they do not look as serious as XLR setups. Still, many home videos, courses, podcasts, and livestreams can sound clean with a well-used USB condenser.
The limits are usually placement, monitoring, desk noise, and upgrade flexibility. A USB mic used correctly can sound better than an XLR mic used badly.
Truth: USB Can Be a Smart Simple Setup
A USB condenser is useful when you want fewer cables and a faster workflow. Choose one with a headphone jack if you want easier monitoring while recording.
Keep it off the desk if bumps and typing noise travel through the stand. When you later move to XLR, the skills you learned with distance, gain, and placement still apply.
Use Phantom Power and Loud Sources Correctly
Some condenser mic concerns come from misunderstanding how the gear works. Phantom power, loud voices, and high sound levels can seem intimidating at first.
Most issues come from careless plugging, high headphone volume, or poor gain settings. Once you learn the basic rules, condenser microphones feel much less fragile.
Myth: Phantom Power Is Dangerous
Phantom power sounds risky because it involves extra voltage, but it is normal for most XLR condenser microphones.
Modern interfaces are designed to provide it in a controlled way. The bigger mistake is plugging, unplugging, or switching gear while monitoring loudly. Careful setup habits matter more than fear of the phantom power button.
Truth: Condensers Can Handle Real Sound
Condenser mics are not only for soft voices and quiet rooms. Many can handle strong speech, singing, and instruments when levels are set properly.
The problem is usually clipping in the input chain, not the microphone being too delicate. Use conservative gain, keep distance consistent, and use a pad switch if your mic has one and the source is very loud.
The Bottomline
Condenser microphones are not magic, but they are not a trap either. They reward quiet spaces, stable placement, clean levels, and good recording habits.
Start with a simple setup you can repeat before buying more accessories or expensive upgrades. When the room, mic, and technique work together, a condenser can give home creators clear and professional-sounding audio.