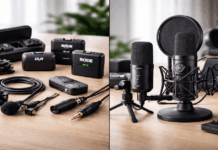
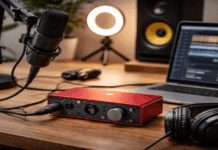
A microphone that once sounded fine does not suddenly become useless because a newer model appears online.
In many home recordings, the real problem is too much distance, room reflection, or a small connection issue that makes speech seem dull, harsh, or noisy.
That is good news for podcasters, gamers, video creators, and remote workers who need clearer sound but do not want to replace working equipment.
This article looks at the changes that usually matter first, the accessories worth testing, and the limits that should make you consider a replacement.
Hear the Real Problem Before You Start Shopping
A microphone is easy to blame because it sits in front of you, but it only captures the space and settings around it. One recording made during your usual routine can reveal whether you need a physical adjustment or a technical fix.
Make a Test Clip That Sounds Like Your Usual Work
Record thirty seconds in the place where you normally speak. Leave a little silence at the start, type or move as you usually would, and talk at a natural volume instead of using a dramatic “test voice.”
Listen back on headphones and a phone speaker; one may reveal a hum while the other makes room echo more obvious. That first clip shows whether the biggest issue is background noise, low volume, or an unpleasant room sound.
Do not change everything at once. Write down the one problem that distracts you most, change one thing, and make the same clip again. This keeps your spending connected to an audible result rather than a product description. These quick clues can narrow the search:
- Boomy speech: room reflections are reaching the microphone.
- Thumps or clicks: the desk is carrying vibration.
- Sharp P sounds: bursts of air are hitting the capsule.
Bring the Microphone Closer Before Raising the Gain
A quiet voice often means the microphone is too far away, not that it lacks quality. Raising the gain from across the desk also raises keyboard clicks, fans, and every reflection from the room.
Move it closer, aim it slightly past your mouth rather than straight at it, and lower the level before recording again. Better mic placement can improve voice clarity more than replacing a microphone that was already capable of doing the job.
Also Read: How to Avoid Background Noise in Home Audio – Easy Upgrades for Clearer Sound
Make the Desk Setup More Predictable
Once the microphone is close enough, it needs a stable place to stay. You are not building a showroom; you are creating a repeatable setup that sounds similar each time you record.
Use a Mount That Fits Your Actual Routine
A desk stand works for some people, but a boom arm can keep the microphone near your mouth without hiding your notes or camera.
It also stops small position changes that make one episode sound thin and another overly bassy. A compatible shock mount may reduce desk vibrations.
Check the official specifications for thread size, weight limits, clamp depth, and included adapters. A secure boom arm supports consistent distance, while a poor fit can sag or create clicks.
Soften Plosives Without Covering the Microphone in Accessories
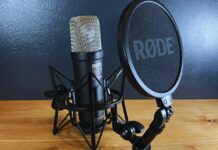
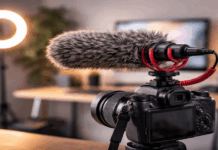
Plosives are the abrupt air bursts from words with P and B sounds. A simple pop filter or foam windscreen can soften them, especially when you speak close to the microphone, but the angle still matters.
Leave a little space between your mouth and the filter, then speak across the microphone rather than directly into it. This preserves clear speech while reducing breath hits that can spoil a clean sentence.
Treat the Room as Part of the Audio Chain
A clear microphone can still sound boxy in a hard, empty room. After placement, the next useful question is how much of the room sound is entering the recording.
Use the Things You Already Own Before Ordering Foam
Bare walls, hard floors, windows, and empty corners reflect speech back toward the microphone.
Curtains, a rug, a bookcase, or soft furniture near the recording position can reduce the most distracting reflections without turning the house into a studio.
Start by moving away from a corner and recording another test in a more furnished area. The goal is a drier voice with less hollow ring, not a room with no character at all.
Inspect Cables, Levels, and Software Last
After you improve placement and the room, listen for problems that remain. Crackles, hum, or distortion may come from the signal path, while software should be used for finishing, not rescue work.
Solve Connection Problems Before Replacing Gear
If a crackle appears when you move a cable, test that cable with another device before replacing the microphone or interface.
Check that plugs are fully seated, keep audio leads away from power bricks where practical, and inspect worn ends or loose connectors.
A sound cable with reasonable shielding can prevent some interference, but an expensive name alone does not guarantee a quiet recording. This small maintenance check protects a cleaner signal.
USB microphones already contain their own audio circuitry, so an external interface will not usually improve their core sound. XLR microphones are different because their gain and monitoring depend on an interface or preamp.
If an XLR setup is noisy, check its cable, gain setting, and power before blaming the microphone. Knowing which path you use prevents mismatched upgrades and wasted budget.
Leave Space on the Meter and Use Light Editing
A waveform that reaches the top of the meter can distort permanently. Speak at your normal loudest level, including laughter or emphasis, then reduce gain enough to leave room for sudden peaks.
You can raise the finished audio later; you cannot fully repair clipping. Aim for safe headroom rather than a constantly maxed-out level.
Equalization, compression, and noise reduction can polish a recording after the source is clean. Use each gently, because heavy processing can make a voice metallic, flattened, or oddly hollow.
Save the original file and compare it with the edited version before committing to a setting. A restrained editing pass protects natural speech better than aggressive cleanup.
Let a New Microphone Earn Its Cost
Replacing a microphone may be sensible when the current one is damaged, cannot suit your recording style, or lacks a required connection.
Until that point, a closer position, a steadier mount, a softer corner, and sensible levels may improve home audio more than an impulsive purchase.
Make recordings after each adjustment, keep only changes listeners clearly notice, and skip accessories that only look professional on a desk. When you can name a real limitation, your next upgrade will reflect evidence rather than frustration.