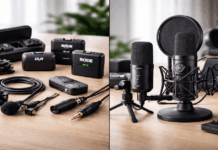
That bedroom recording sounds hollow. The audio clips when you laugh too loud. And every “best microphone” list gives you ten options without telling you which one fits your actual room.
Picking the best entry-level microphone comes down to one thing nobody frames correctly: your room, not the mic’s spec sheet, decides how you sound.
A $100 dynamic mic in a noisy apartment will outperform a $200 condenser in that same space. The creator who understands this spends less and sounds better on day one.
So let’s sort through the entry-level microphone options that matter for content creators recording at home in 2026. No filler. Just the mics worth your money and the setup logic behind each one.
Your Room Picks Your Microphone: Not the Other Way Around
The single biggest mistake new creators make is buying a microphone based on someone else’s recommendation without thinking about the space they record in.
A mic that sounds clean in a treated studio sounds completely different in an echoey bedroom with a window AC unit running.
Dynamic vs. Condenser: the Room Test
Dynamic mics pick up sound in a tighter pattern. They’re less sensitive to noise that’s farther away, which makes them forgiving in untreated spaces. Think of them as the mic that listens to your mouth and mostly ignores your ceiling fan.

Condenser mics capture more detail and a wider frequency range. That extra sensitivity sounds great in a quiet, controlled room.
But it also means they pick up keyboard clicks, street traffic, room echo, and the neighbor’s dog. So the question is simple: how quiet is the room where you record?
If the answer is “not very,” start dynamic. If the answer is “I have carpet, soft furniture, and a closed door with minimal noise,” a condenser can work well.
USB vs. XLR: the Hidden Cost Question
USB mics plug straight into your computer. No extra gear. That’s the full setup. For a first-time creator, this removes every possible friction point between buying the mic and recording the first episode.

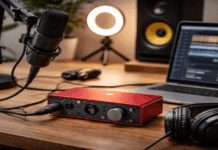
XLR mics need an audio interface (a separate box that converts the analog signal to digital). Decent interfaces like the Focusrite Scarlett Solo run around $100 to $130. So a $99 XLR mic becomes a $200 to $230 total investment before you record a single word.
Nobody frames XLR cost this way in mic recommendation lists, and it matters. A creator on a $150 total budget who buys an XLR mic and then realizes they need an interface is stuck.
The exception is the Samson Q2U, which supports both USB and XLR connections. Start on USB now. Move to an interface later when the budget allows.
That dual-connection design is why I think the Q2U at $99.99 is the smartest first purchase for creators who aren’t sure about their long-term setup yet.
Also read: Lighting Accessories That Actually Help
Best Entry-Level Microphones Compared: Price, Type, and Connection
The mics below are the ones that show up repeatedly in entry-level creator conversations for good reason. Each fills a different role depending on room conditions and budget.
| Microphone | Type | Connection | Approximate Price | Best Fit |
|---|---|---|---|---|
| Samson Q2U | Dynamic | USB + XLR | $99.99 | Noisy rooms, budget-flexible creators |
| RØDE NT-USB Mini | Condenser | USB | $102 | Small desk setups, podcasting |
| Shure SM58 | Dynamic | XLR only | $109 | Live-style durability, imperfect rooms |
| Audio-Technica AT2020 | Condenser | XLR only | $119 | Voiceover work in quiet rooms |
| RØDE PodMic | Dynamic | XLR only | $99 | Broadcast-style voice, podcast focus |
The pattern worth noticing: every dynamic option sits at or under $110, while condensers that need XLR push the total cost higher once you add an interface.
Also read: Common Home Lighting Mistakes in Video Recording
Entry-Level Microphone for Streaming: What Holds Up During Long Sessions
Streaming is different from podcasting or voiceover work. A stream mic has to handle hours of talking, typing, reacting, and sometimes yelling at a game. That means side-noise rejection and simple gain control matter more than raw audio fidelity.
The RØDE NT-USB Mini for Streaming
The RØDE NT-USB Mini lists around $102 at B&H and is compact enough for tight desk setups.
It’s a condenser, so it does pick up room sound. But its small footprint and built-in headphone monitoring make it a practical streaming mic for creators whose rooms are reasonably quiet.
One thing to watch: condenser mics like this one will catch mechanical keyboard noise if the keyboard sits within a foot or two of the mic capsule.
A boom arm that positions the mic between your mouth and the keyboard (rather than behind the keyboard) can reduce this problem.
The Elgato Wave:3 for Creator-Focused Streaming
The Elgato Wave:3 was built specifically for streamers and has a built-in digital clipguard that prevents audio distortion during loud moments.
For someone who streams games and reacts vocally, that clipguard feature is a real quality-of-life improvement over mics that just let the audio clip.
It’s USB-only, which means no future XLR upgrade path. But for a creator who plans to stay in the USB workflow, the Wave:3 handles streaming audio consistently well.
Best Entry-Level Podcast Microphone: Voice Consistency Over Raw Detail
Podcast listeners tolerate a lot of things. Background music. Casual conversation. Occasional crosstalk. The one thing they don’t tolerate is audio that changes quality every time the host shifts position.
Samson Q2U for Podcast Beginners
The Samson Q2U keeps showing up for a reason. At $99.99, it’s a dynamic mic with both USB and XLR outputs.
Dynamic mics need close positioning (about 2 to 4 inches from the mouth), which means the audio stays consistent even if you lean back slightly during a conversation.
I would pick the Samson Q2U over the Blue Yeti for any podcaster recording in an untreated room, specifically because the Q2U’s dynamic capsule rejects room noise that the Yeti’s condenser picks up without mercy.
The Yeti’s four polar patterns sound like a selling point until you realize that cardioid is the only pattern 90% of solo podcasters ever use.
Audio-Technica AT2020 for Voiceover-Style Podcasts
If the podcast format is scripted narration or a solo voiceover show recorded in a quiet room, the Audio-Technica AT2020 at around $119 is a strong condenser option.
It captures more vocal detail than most dynamics at this price, which suits a host who wants that polished, close-mic narration sound.
The tradeoff: it’s XLR-only, so factor in an audio interface. And condenser sensitivity means the recording environment needs to be controlled. Bare walls and hard floors will show up in the audio.
The Blue Yeti Problem and Why I’d Skip It in 2026
Every beginner mic list includes the Blue Yeti. I think that recommendation is outdated.
The Yeti is physically large. On a standard desk, it takes up real estate and sits at an awkward height unless you buy a separate boom arm. It’s a condenser mic, so it picks up everything: typing, fans, AC, footsteps from the next room.
And its four selectable polar patterns (cardioid, bidirectional, omnidirectional, stereo) sound like versatility but add complexity that a new creator doesn’t need.
A first-time creator recording in a bedroom would get cleaner audio from a Samson Q2U at the same price point, simply because the dynamic capsule ignores more room noise.
I’d rather see a beginner start with a mic that makes their room sound decent than one that exposes every acoustic problem in the space.
That said, the Yeti can work well if the room is quiet and the creator wants a USB condenser with a larger capsule for a richer vocal tone. The problem is that “quiet room” is the exception for bedroom creators, not the rule.
Mic Technique Matters More Than the Mic Itself
This is the part that every equipment list skips. Mic technique creates the biggest audio improvement at entry level. A $99 mic with good technique will beat a $300 mic with bad technique every time.
Three setup habits that change your audio immediately:
- Keep the mic 2 to 4 inches from your mouth. Farther away means more room sound in the recording. Closer means more bass (proximity effect) and less ambient noise. Find the sweet spot and stay there.
- Angle the mic slightly off-axis if you hear plosives (hard “P” and “B” sounds popping). Pointing the mic at the corner of your mouth instead of dead center reduces plosive pressure without losing clarity.
- Use a boom arm or desk stand that locks the mic in position. A mic that shifts between sessions means inconsistent audio. Consistency is what makes audio sound “professional,” not the price of the mic.
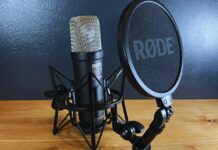
A pop filter helps too, but a mic positioned slightly off-axis already handles most plosive problems. So the pop filter becomes a bonus rather than a necessity.
Starter Kit Logic: What to Buy First
The temptation is to buy a mic, an interface, a boom arm, a pop filter, a shock mount, and cables all at once. That’s $300 to $400 before the first recording.
A simpler approach works better for creators on a budget:
- Step 1: Pick one USB mic (Samson Q2U or RØDE NT-USB Mini). Plug it into the computer. Record.
- Step 2: Add a boom arm once the desk setup feels cramped or the mic position isn’t consistent.
- Step 3: Only move to XLR and an interface when the USB setup limits the workflow, like needing multiple mic inputs or hardware processing.
The Q2U is the only mic on this list that lets you start at Step 1 and upgrade to Step 3 without buying a different mic. That upgrade path is worth the price alone.
Questions People Ask About Entry-Level Microphones
Q: Are USB microphones good enough for YouTube videos?
Absolutely. A USB mic like the RØDE NT-USB Mini at $102 or the Samson Q2U at $99.99 records at quality levels that work perfectly for YouTube. Viewer retention depends far more on audio clarity than on whether the signal path is USB or XLR.
Q: Do I need a pop filter with an entry-level microphone?
Not always. Angling the mic slightly off-axis (toward the corner of your mouth) reduces plosive pops without any extra gear. A pop filter is useful if the mic sits directly in front of your mouth at close range.
Q: Can I use the Shure SM58 for podcasting?
The SM58 at around $109 works for podcasting, though it was designed as a live vocal mic. It needs an XLR interface, and it benefits from more gain than some condensers require. For a podcast-first setup, the Samson Q2U or RØDE PodMic may be more practical starting points.
Q: What’s the difference between cardioid and omnidirectional for a beginner?
Cardioid picks up sound mainly from the front of the mic and rejects sound from the sides and back. Omnidirectional picks up sound from every direction equally. For solo recording in a bedroom, cardioid is almost always the better choice because it isolates your voice from background noise.
Q: Is the Shure MV7+ worth the extra cost over the Samson Q2U?
The MV7+ offers USB and XLR dual connectivity with a more refined build, but it costs more than most entry-level options. For a creator on a tight budget, the Q2U covers the same dual-connection ground at a lower price point. The MV7+ may be worth it for someone who wants a polished look and built-in tone controls.
Conclusion
The best entry-level microphone is the one that works with your room, not against it. Spending $99 on the right mic beats spending $200 on the wrong one every single time.
Start with USB, learn your mic technique, and upgrade only when the setup limits what you can do. The gear matters far less than how you use it.