A good lighting setup makes your videos look cleaner before you ever touch editing.
You can build a reliable setup with a small room, one camera or webcam, and a few basic accessories.
You will build an easy lighting setup that stays consistent across different shooting days.
Step 1: Define your goal and pick the recording spot
Choose one place to record so your setup stays repeatable and your results stay consistent.
Decide if you want a bright, natural look or a moodier, more creative lighting setup.
Mark where your tripod and chair will go so your framing and light angles do not drift.
Treat this as the start of a building lighting layout that you can refine over time.
Decide what the light needs to show
Your light should make your face clear, your eyes bright, and your background calm.
Your light should match your content style so your audience sees the same look every video.
Your light should support your audio gear by keeping lights quiet and away from your microphone pickup.
Control what is behind you
Keep the background simple so the light does not reveal clutter or distracting reflections.
Move shiny objects and glossy frames because they can bounce light into your lens.
Leave a little distance from the wall so shadows look softer and the background looks more professional.
Step 2: Choose the right lights for your budget
Start with one good light before you buy multiple weak lights that fight each other.
Pick lights that let you control brightness and color temperature for fast adjustments.
Choose stable stands or clamps so your light does not sag during longer recording sessions.
Think of this purchase as the foundation of a lighting setup for content creators that can expand later.
Pick a light type that matches your use
LED panels are versatile for desks and small rooms because they spread light evenly.
COB lights are stronger for larger spaces because they punch through diffusion more easily.
Ring lights can work for webcams, but they often look flat and can create obvious eye reflections.
Match power and size to your room
Small rooms usually need less power because the light bounces around and fills shadows quickly.
Medium rooms benefit from stronger lights because diffusion and distance reduce brightness fast.
If your light must sit far away, choose higher output so you do not need extreme camera gain.
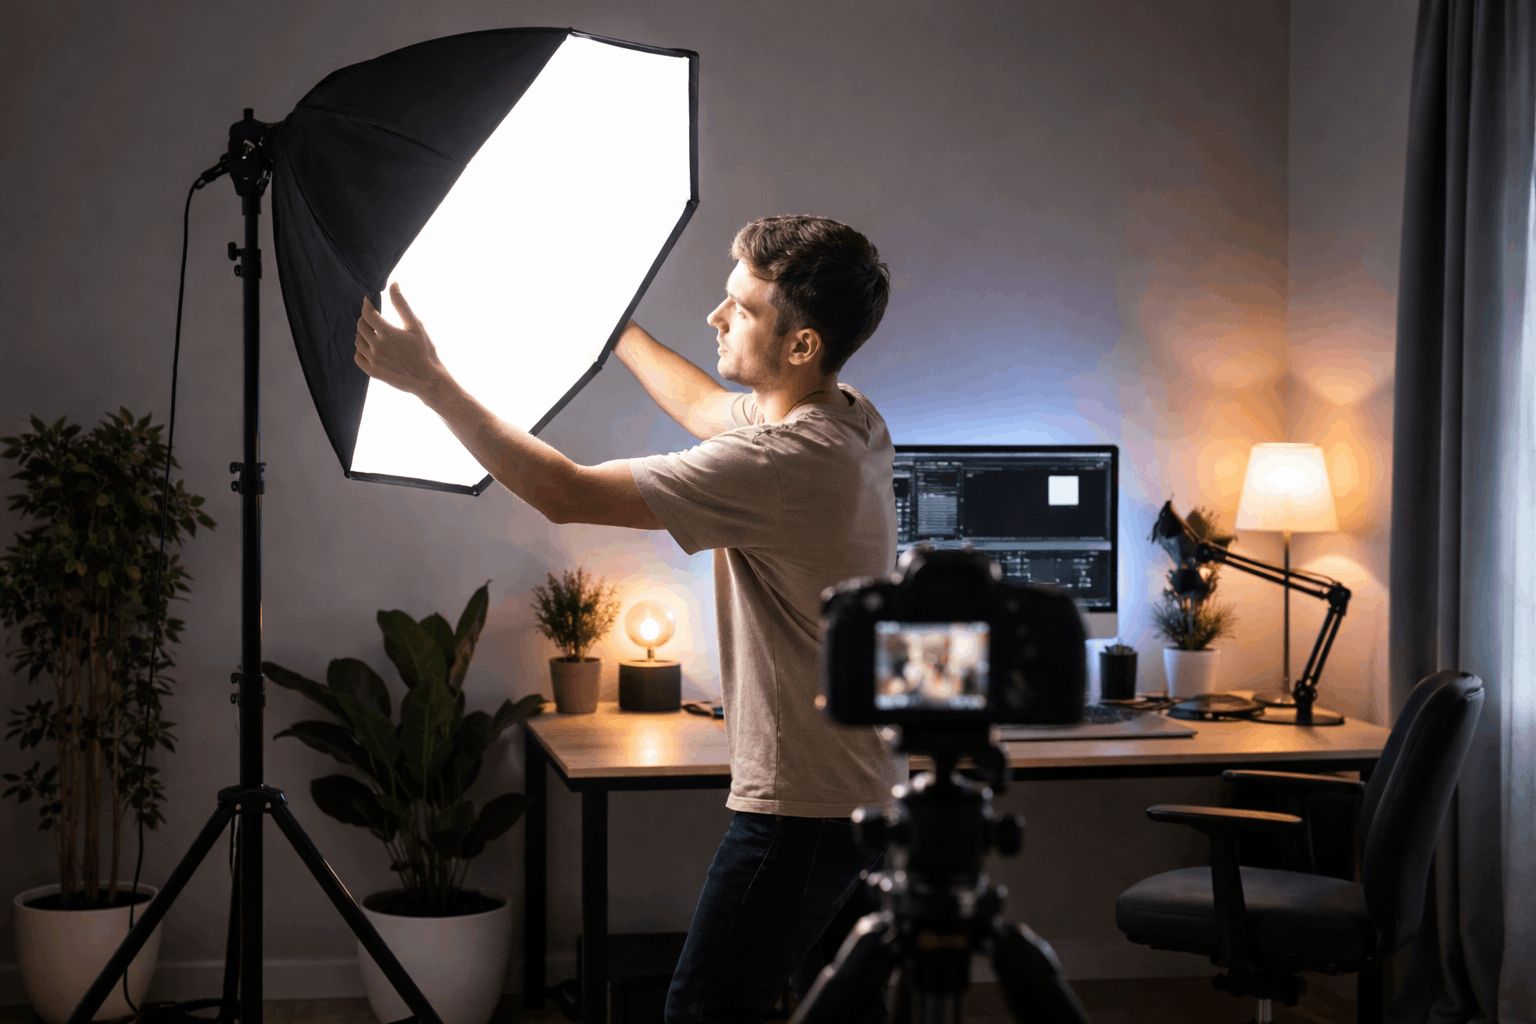
Step 3: Set your key light first
Place the key light before anything else because it defines the shape of your face on camera.
Aim for soft light by adding diffusion rather than blasting a harsh bare source.
Use a consistent angle so your look stays the same across different recording days. This key light step is the anchor for your building lighting layout.
Keep the diffusion close to the light source so you get softness without losing too much brightness.
Step 4: Add fill light and control contrast
Use fill light to manage shadows so your face stays readable on webcams and cameras alike.
Keep fill weaker than the key so your video does not look flat and overlit.
Adjust fill based on your camera and skin tones rather than copying someone else’s exact settings.
This is where your setup becomes an easy lighting setup instead of a guesswork mess.
Use fill light the simple way
Place a smaller light near the camera axis to lift shadows without changing the key light direction.
Dim the fill until shadows remain visible but not distracting, which often looks more natural.
Keep contrast consistent across sessions
Lock your light positions using floor tape so your fill ratio stays consistent each time you record.
Take a reference photo of your setup so you can rebuild it quickly after moving gear.
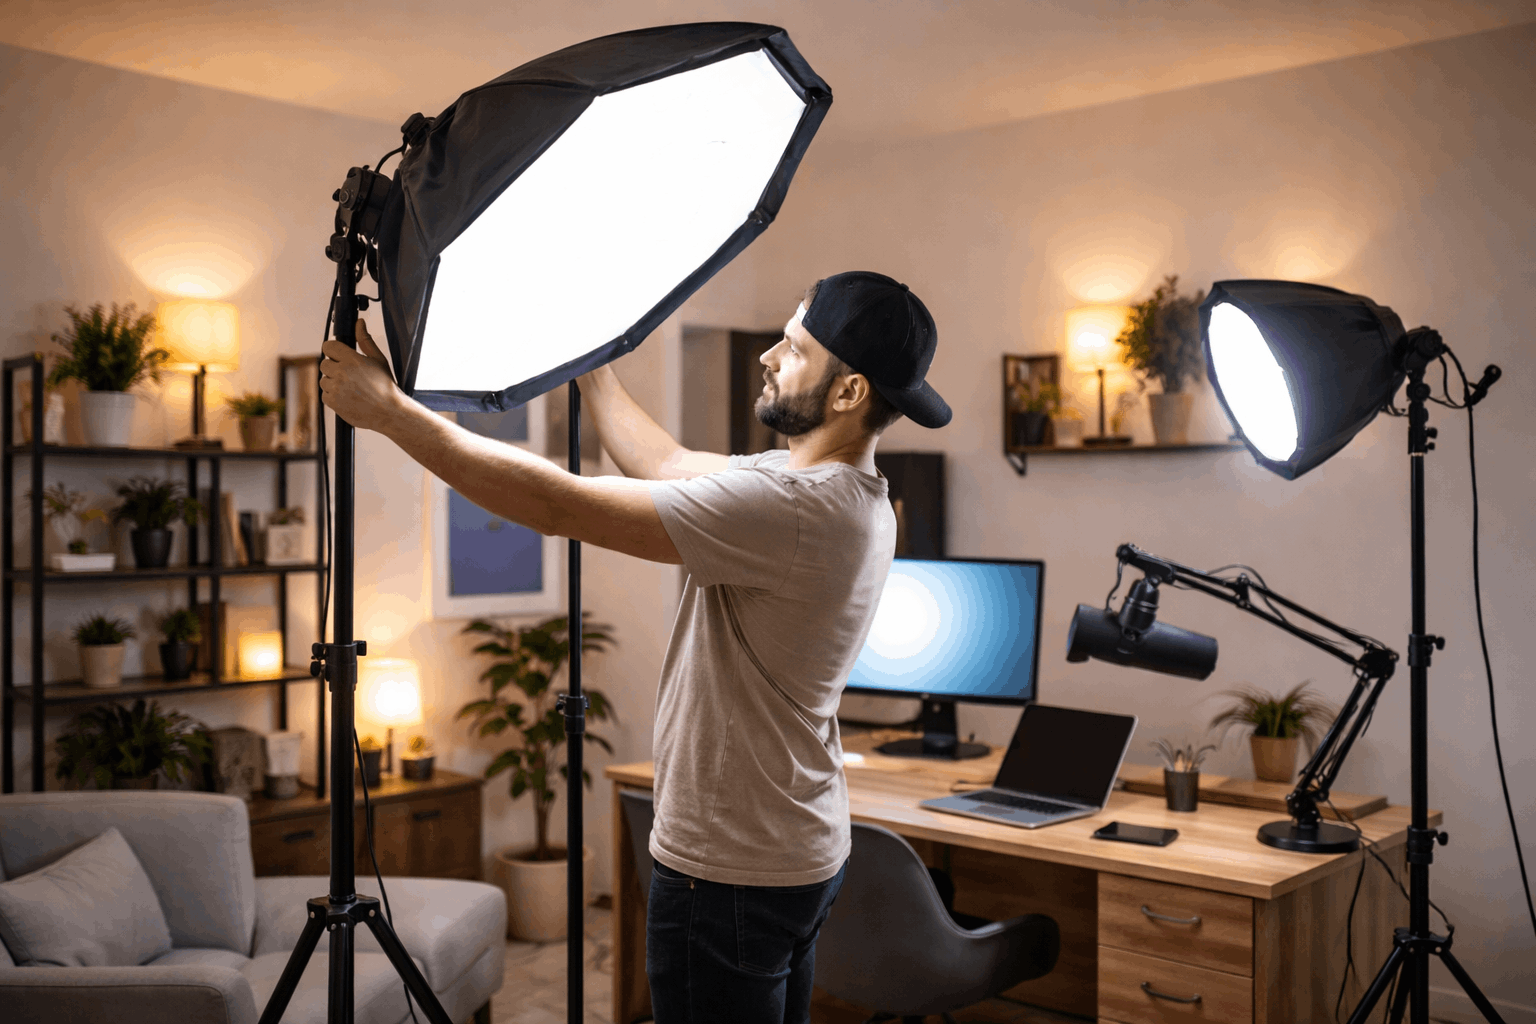
Step 5: Add separation with a backlight and background light
A backlight separates you from the background so you look more three-dimensional on camera.
Background light can add depth and style without forcing your face light to do everything.
Keep these lights subtle so your subject stays the focus of the frame.
These steps are how a basic kit turns into a controlled creative lighting setup.
Step 6: Balance color temperature and white balance
Set color temperature so your skin looks natural and your video does not shift between warm and cool.
Match all lights to the same temperature so your shadows do not turn strange colors.
Set white balance manually when possible so your camera does not hunt during recording.
This step protects the quality of any lighting setup for content creators using webcams or cameras.
Choose a consistent color temperature
Use daylight tones for a clean look, especially when you are mixing with window light.
Use warmer tones for a cozy look, but keep it consistent across key, fill, and background.
If your lights are adjustable, pick one number and keep it saved as your default.
Lock your camera settings for stability
Turn off auto white balance when your camera allows it, because it can shift mid-sentence.
Set exposure so your face is not clipped, because overexposure removes detail you cannot recover later.
Step 7: Reduce shadows, glare, and reflections
Shadows and glare usually come from light placement mistakes, not from a lack of expensive gear.
Small changes in height and angle often solve problems faster than buying new equipment.
You should fix reflections before you record because they are distracting and hard to remove later.
This is the cleanup step that makes your building’s lighting layout look intentional.
Fix harsh shadows fast
Move the key light closer and diffuse it more to reduce sharp shadow edges.
Raise the fill slightly to lift heavy shadows under the eyes and chin.
If shadows hit the wall behind you, pull yourself farther from the wall or add a soft background light.
Step 8: Build a repeatable workflow with simple accessories
A repeatable setup saves time and keeps your videos consistent, which matters more than perfect gear.
Use accessories that reduce friction, like quick-release plates, clamps, and cable ties.
Create a checklist so you can set up in minutes, even when you are tired or rushed.
This turns your setup into a true, easy lighting setup for regular publishing.
Organize your gear like a small kit
Keep your lights, stands, and diffusion in one place so you do not skip steps when you are in a hurry.
Label your brightness and color settings in your notes app so you can reset quickly after changes.
Store spare batteries, power supplies, and adapters near your tripod so nothing blocks recording time.
Final check before you hit record
Save your default positions and settings so your lighting setup for content creators stays consistent across videos.
Keep refining your building lighting layout one small change at a time, and test before buying upgrades.
With these steps, you can maintain an easy lighting setup that looks clean on webcams and cameras for everyday creator workflows.


