Creating content in a shared home can work well when your setup is easy to repeat, quick to store, and respectful of the space around you.
You do not need a spare bedroom to record videos, podcasts, voiceovers, or livestreams. What you need is one reliable spot, basic control over sound and light, and a workflow that does not interrupt the rest of the household.
Small setup choices often matter more than expensive upgrades, especially when space is limited.
Choose a Recording Spot That Fits Real Home Life
A shared home setup has to work around daily routines. People may walk through the room, appliances may run nearby, and the space may need to return to normal after recording.
This is why your setup should feel like a small system you can assemble, use, and reset. The best spot is not always the biggest area, but the one you can control most often.
Look for the Quietest Usable Corner
Start by checking where you can record without blocking the normal flow of the home. A desk corner, small table, bedroom wall, or Carea near a window can work if it gives you enough room for a camera, light, and microphone.
Avoid the center of the room when possible because foot traffic, voices, and movement usually happen there. A corner or wall-facing setup often gives you more control and fewer distractions.
It also helps to test the room at different times of day. A space that feels quiet in the morning may become noisy later when neighbors, family members, traffic, or appliances are more active.
If you notice repeated noise patterns, plan recording around them instead of fighting them every time. This makes your workflow more realistic.
Also Read: How to Build a Lighting Setup Step by Step

Set Boundaries Without Making the Setup Feel Heavy
Shared spaces work better when other people know when you are recording. A simple signal, such as a door sign, calendar block, or message in a family chat, can prevent accidental interruptions.
It does not have to be formal or strict. It just needs to help people understand when you need a short quiet window.
Boundaries also apply to the space itself. If you use a shared desk, dining table, or bedroom corner, make the setup easy to remove after recording.
Keeping your equipment compact reduces tension because the space does not feel permanently taken over. A good shared-home setup should help you create without making the room harder for everyone else to use.
Control Sound and Lighting Before Buying More Gear
In a shared home, audio and lighting problems are usually more noticeable than camera limitations. Echo, background noise, dim rooms, and harsh shadows can make content feel less polished even when the idea is strong.
Fixing these basics first gives your current phone, webcam, or camera a better chance to perform well. It also keeps you from buying gear that does not solve the real problem.
Reduce Echo With Soft Materials
Shared rooms often have hard floors, bare walls, windows, and furniture that reflect sound. This can make your voice sound distant, sharp, or hollow.
You can improve it without construction by adding soft materials near the recording area. Rugs, curtains, blankets, fabric chairs, and bookshelves can all help reduce sound reflections. If you rent or cannot mount panels, use movable solutions.
A clothes rack with thick fabric, a curtain behind the recording area, or a blanket placed off camera can soften the room during recording. The goal is not to make the room silent. It is to make your voice clearer and less harsh.
Record Around Household Noise
Noise control in a shared home is partly about timing. Before recording, close windows, silence notifications, pause noisy appliances when possible, and listen for sounds the microphone may capture.
Small noises like fans, washing machines, doors, or street traffic can feel much louder in the final recording.
A dynamic microphone can be helpful if your home is often noisy because it usually picks up less room sound than many sensitive condenser microphones.
Still, microphone choice is only part of the solution. Placing the mic closer to your mouth, speaking consistently, and recording shorter sections can make editing easier.
If noise interrupts one take, you can redo a short section instead of losing the whole session.
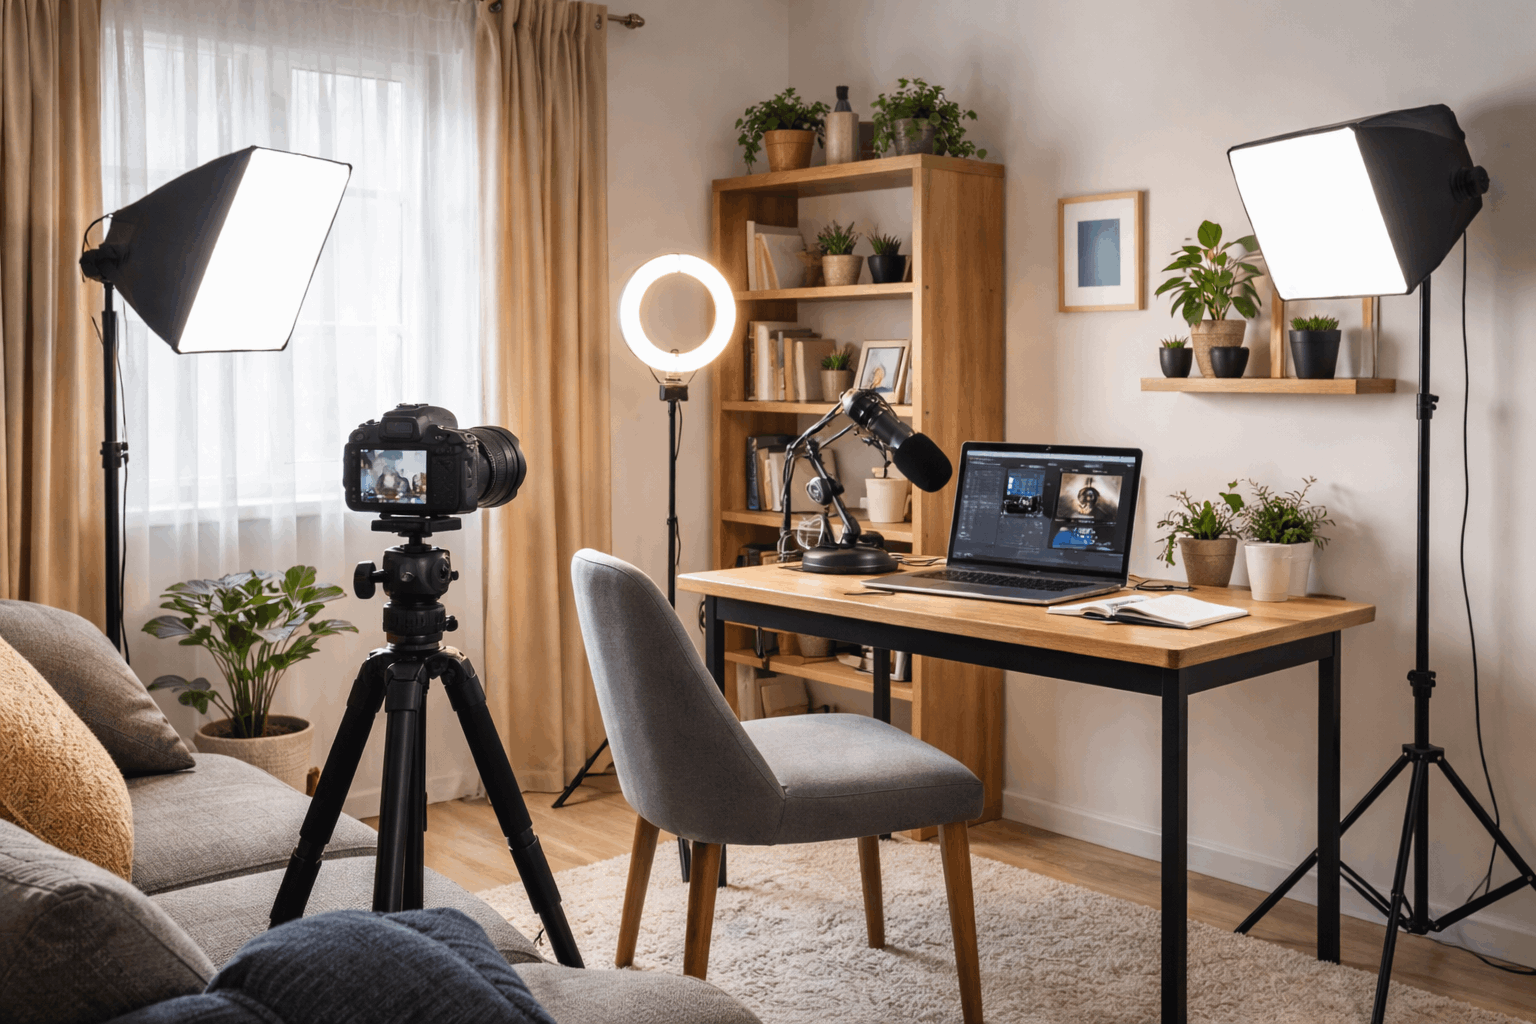
Keep Lighting Simple and Repeatable
Lighting can make a small shared corner look more intentional. A compact LED panel, ring light, or desk lamp can work if it is placed consistently.
If you use natural light, try to record at a similar time of day so the look does not change too much. Marking your light position with tape or taking a reference photo can help you rebuild the setup quickly.
Try to avoid mixed light sources. Daylight from a window plus warm ceiling bulbs can create uneven skin tones or strange color shifts.
If possible, use one main light source and turn off lights that confuse the camera. A simple lighting setup that repeats well is usually better than a brighter setup that changes every session.
Keep the Frame Clean and the Workflow Fast
A shared room does not need to look like a studio, but the camera frame should feel controlled. Viewers only see what is inside the shot, so your goal is to manage that small area well.
A clean background, steady camera, and organized gear can make the setup feel more professional. These practical details also make recording faster when the room is not always yours to use.
Create a Repeatable Camera Position
Use a tripod, phone clamp, or stable desk mount so your framing does not change every time. Stacking books can work in an emergency, but it often leads to small shifts that waste time.
A steady camera position also helps your content look more consistent across videos, streams, or reels. If your camera app allows it, lock focus and exposure once the frame looks right.
The background should be simple enough that it does not distract from your message. A plain wall, curtain, tidy shelf, or clean desk area can work well.
Remove bright objects, clutter, glossy frames, or anything that pulls attention away from you. Background control is usually about removing distractions, not creating a perfect studio wall.
Store Gear So Setup Does Not Become a Chore
A non-dedicated room needs a storage system that makes sense. If your gear is hard to find, tangled, or spread across the house, recording will feel harder than it should.
Keep your core items together so you can set up quickly and pack away without stress. This also helps protect equipment from being moved, stepped on, or mixed with household items.
Use one simple setup-and-teardown routine:
- Keep cables, chargers, and adapters in one pouch or labeled box.
- Store the microphone, light, and tripod near the recording spot.
- Use a tray for small items like memory cards, batteries, lens cloths, and clips.
- Take a reference photo of the final setup so you can rebuild it faster.
- Back up recordings after each session before clearing the space.
This kind of routine reduces small failures. Loose cables, missing adapters, and forgotten batteries can delay a session more than the actual filming. When each item has a place, you spend less time searching and more time creating.
Improve Only What Keeps Slowing You Down
A shared-home setup should grow based on real problems. If your sound is echoey every time, improve the microphone position or add soft materials.
If the room looks dark, fix the lighting before replacing the camera. If setup takes too long, improve storage and cable organization first.
Avoid buying gear just in case. Extra equipment can create more clutter, especially in a room used by other people.
A small setup that works every week is more useful than a larger setup that feels stressful to assemble. Upgrade only when the same limitation keeps showing up in your recordings.
Conclusion: Make the Shared Space Easier to Record In
A creator setup without a dedicated room works best when it stays consistent, compact, and easy to reset.
Prioritize clear audio, stable lighting, and a controlled background before spending on bigger upgrades.
Use a simple routine so recording does not disrupt the rest of the home. When your setup fits the space you actually have, creating becomes easier to repeat.


