
Overexposed video happens when the camera receives more light than it can record properly. Bright areas turn into flat white patches, and details in skin, walls, windows, or objects disappear.
This can make a simple home video look harsh, distracting, and harder to watch. The good news is that most overexposure problems can be fixed with better light placement, camera control, and a repeatable setup.
Understand What Overexposure Looks Like
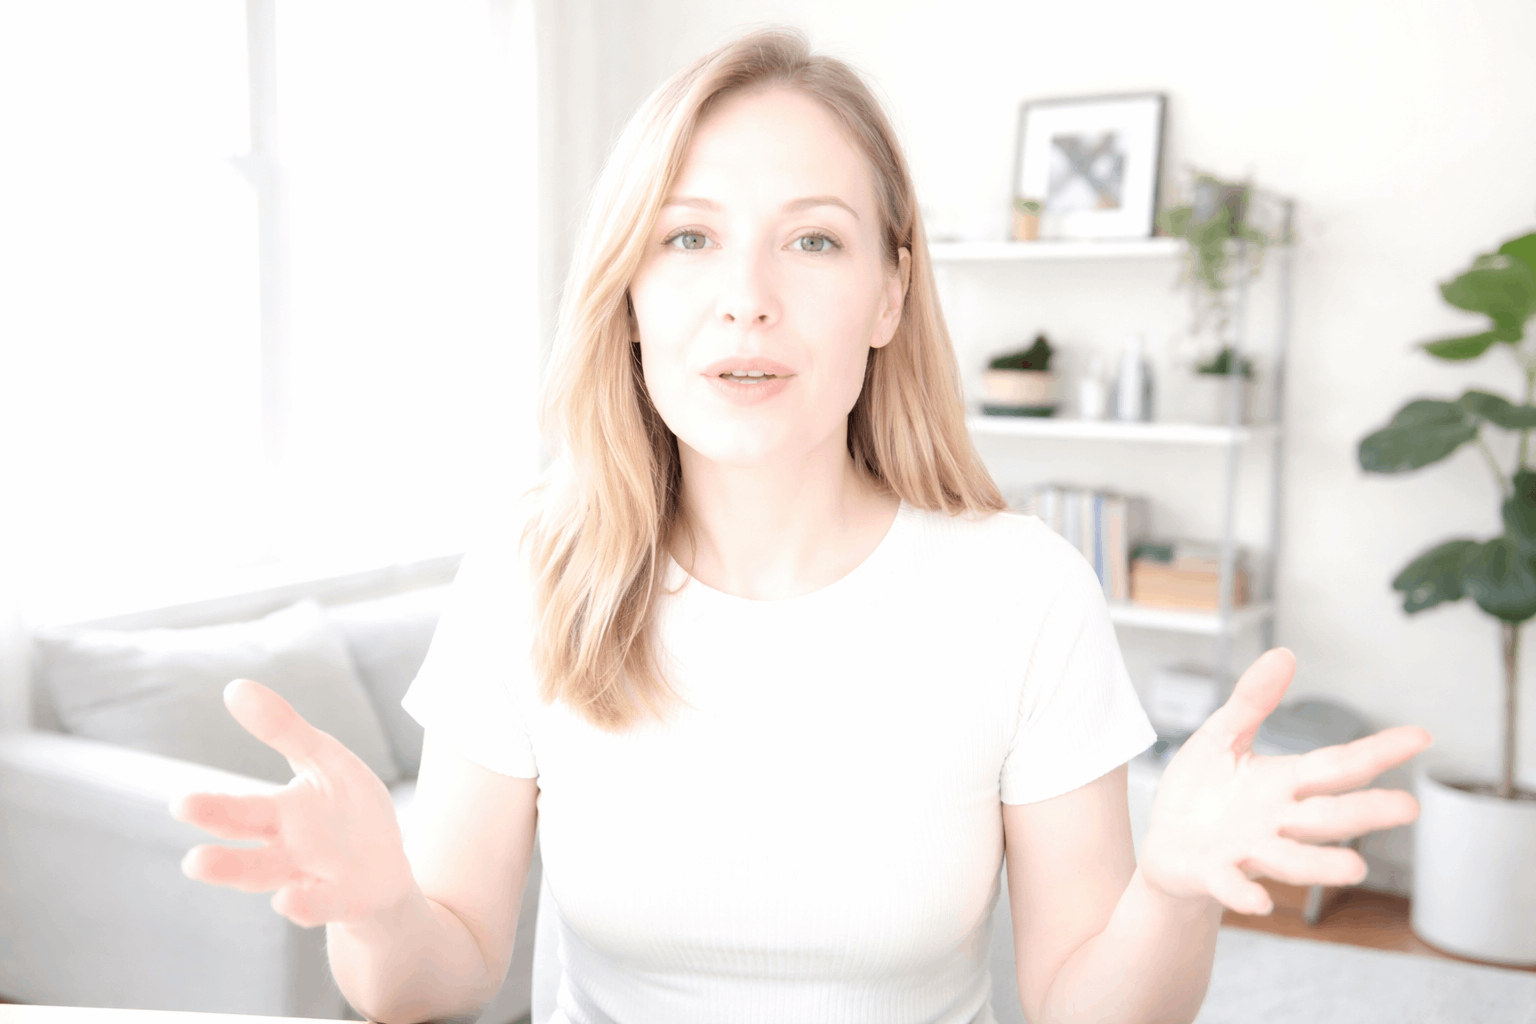
Overexposure is not just a video that looks bright. It happens when highlights lose texture and become pure white.
Once that detail is gone, editing usually cannot bring it back fully. This is why it helps to catch the problem before recording the full video.
Notice Clipped Highlights Early
Look at the brightest parts of your face first, especially the forehead, cheeks, and nose. If those areas look shiny and flat, the camera may be clipping highlights.
A white wall, window, paper, or bright shirt can also turn into a blank shape with no detail. These signs mean the camera needs less light or darker exposure settings.
Watch for Brightness Pumping
Brightness pumping happens when the camera keeps changing exposure while you move. You may notice the video getting brighter or darker when you gesture, lean forward, or show an object.
This usually means auto-exposure is trying to adjust the whole scene too aggressively. It can make a video feel unstable even if the lighting itself is not changing.
Take Control of Camera Exposure
Auto mode is useful in simple situations, but it often struggles in home setups. A bright window, white desk, lamp, or shiny surface can confuse the camera.
Instead of protecting skin detail, the camera may try to brighten everything too much. Taking control of exposure gives your video a steadier and more natural look.
Lock Exposure When Possible
If your webcam, phone, or camera app allows exposure lock, use it after setting your frame. This stops brightness from shifting while you speak or move.
Locking exposure is especially helpful for talking-head videos, livestreams, and online lessons. Once exposure is locked, you can adjust the light instead of letting the camera chase the scene.
Use Exposure Compensation Carefully
If you cannot fully lock exposure, look for exposure compensation or an EV control. Lower it slightly until skin texture returns and bright areas stop turning white.
The image may look a little darker at first, but that is often safer than losing detail. You can then improve the scene with softer light instead of pushing digital brightness.
Fix the Light Before Buying a New Camera
Overexposure is often a lighting problem, not a camera problem. AA key light that is too close, too direct, or aimed badly can create hot spots even when the rest of the room looks fine.
Moving and softening the light usually helps more than replacing the camera. Your goal is balanced light that makes the face clear without washing it out.
Move the Key Light Back and Soften It
Your key light should brighten your face without blasting it. If the skin looks shiny or flat, move the light farther away or lower the brightness.
Add diffusion with a softbox, umbrella, curtain, or diffuser cloth so highlights roll off more gently. Softer light is usually more flattering and easier for cameras to handle.
Avoid Mixed Light Problems
Mixed lighting can make exposure and color harder to control. Daylight, ceiling bulbs, desk lamps, and LED panels can all push the camera in different directions.
Pick one main light source and turn off lights that create strange color shifts or uneven brightness. If daylight changes too much, block the window or let your artificial light become the main source.
Control the Background and Reflections
A bright background can cause exposure problems even when your face is lit correctly. Windows, glossy desks, mirrors, white walls, and shiny objects can pull the camera’s attention away from the subject.
Reducing those bright distractions helps the camera make better exposure choices. It also gives the video a cleaner, calmer look.
Keep Windows Out of the Main Frame
A window behind you is one of the most common causes of overexposed video. The camera sees the bright background and struggles to expose your face properly.
If you want to use window light, face the window instead of placing it behind you. A sheer curtain can soften daylight and make exposure easier to control.
Also Read: How to Build a Lighting Setup Step by Step

Reduce Reflective Surfaces
Glossy desks, picture frames, glasses, and bright objects can create small blown-out spots in the frame. These reflections may seem minor in person but become distracting on camera.
Move shiny items out of frame or change the light angle so reflections do not hit the lens. A matte background usually gives you more predictable results.
Build a Repeatable Setup for Cleaner Video
A stable setup makes overexposure easier to prevent. When your light, camera, chair, and background stay in the same positions, you can reuse the settings that already worked.
This is better than adjusting everything from scratch every time. It also helps your clips match if you record on different days.
Keep Framing and Tripod Position Stable
Small framing changes can affect exposure because the camera sees a different mix of bright and dark areas. Keep your tripod or webcam at a fixed height, preferably near eye level.
Avoid placing bright lamps, ceiling lights, or windows near the edge of the shot. Once the frame is stable, set exposure again and save that position.
Test Before Recording the Full Video
A short test clip can prevent a full recording from being ruined. Watch the clip and check the face, background, and brightest objects in the frame.
Look for glowing skin, blank white patches, or brightness changes while you move. If anything clips, fix the light or exposure before recording the real take.
Use this quick check before filming:
- Check your forehead, cheeks, and nose for lost skin detail.
- Make sure windows or lamps are not the brightest part of the frame.
- Lower exposure slightly if white areas look flat or blank.
- Soften or move the key light if skin looks shiny.
- Record a short test clip and review it before continuing.
The Bottomline
Overexposed home video usually comes from auto settings, bright backgrounds, or lights that are too close and direct. Start by protecting skin detail, then adjust the room and camera around that priority.
Keep your framing, light position, and exposure settings as repeatable as possible. When highlights stay controlled, your videos look cleaner, more natural, and easier to edit.










