
That orange tint on your face during last week’s recording? That blue shadow creeping across the wall behind your desk? Both problems come down to one thing: color temperature.
And the fix is simpler than the internet makes it sound. A single Kelvin number, applied consistently, changes everything about how your home video looks.
Color temperature for home video trips up creators who own perfectly good cameras and lights. The gear works fine. The settings are wrong.
This guide breaks the Kelvin scale into decisions that matter and skips the physics lecture nobody asked for.
What Color Temperature Means for Your Camera
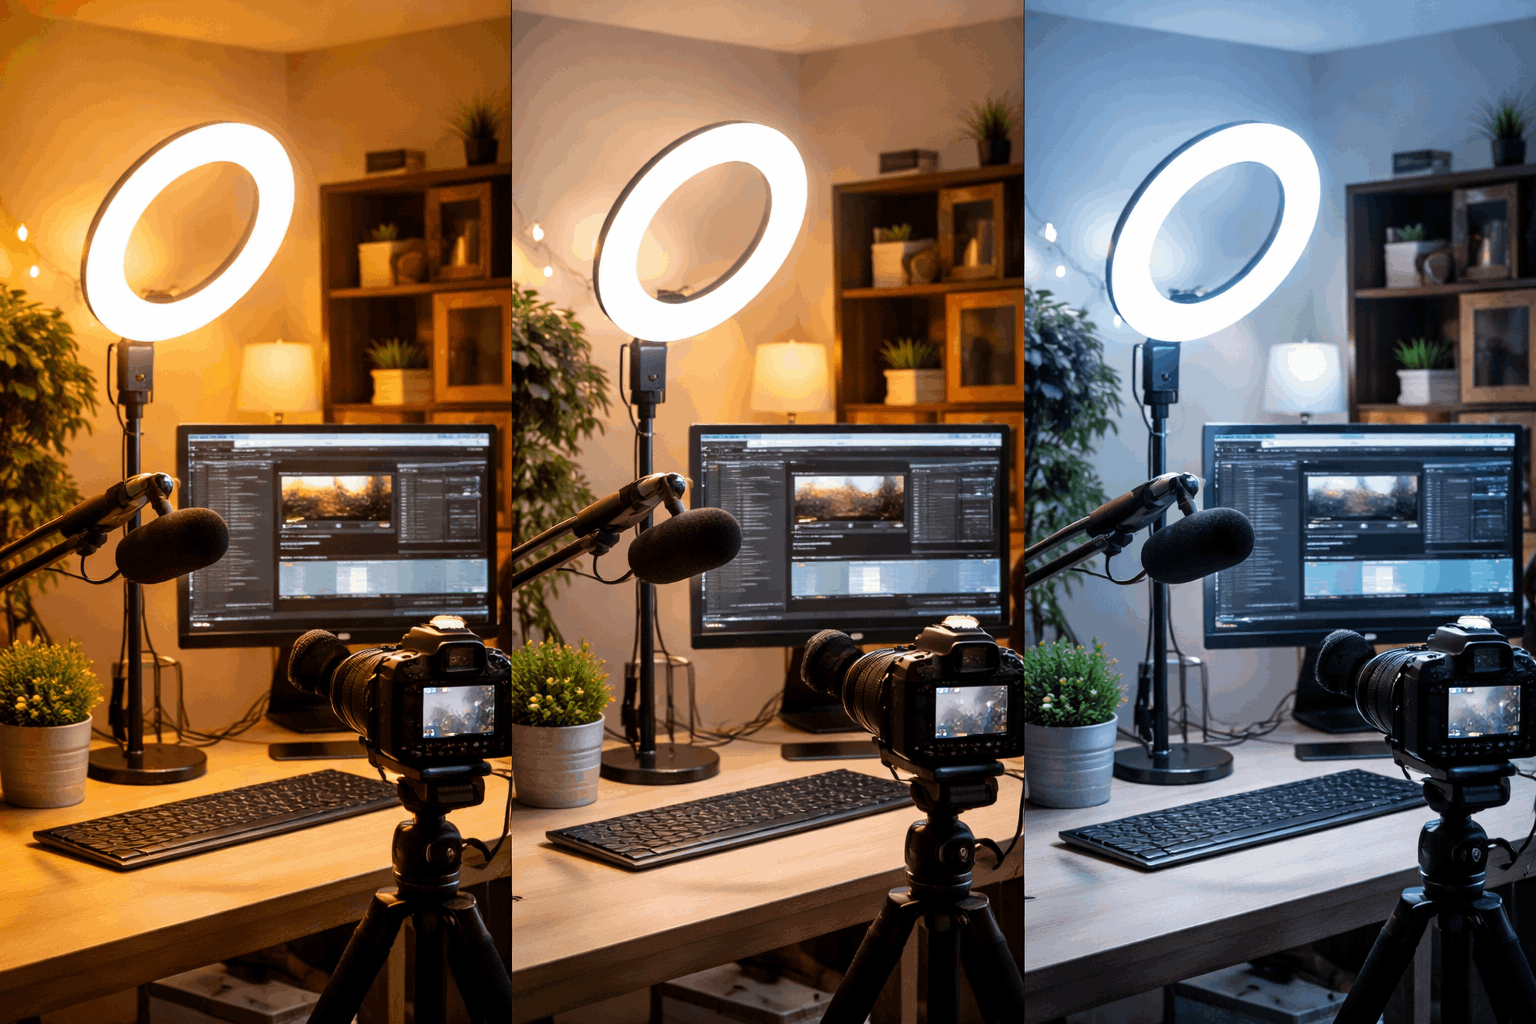
Every light source in your room produces a slightly different shade of white. Color temperature, measured in Kelvin (K), puts a number on that shade. Lower numbers look warm and orange. Higher numbers look cool and blue.
Your camera or webcam tries to guess what “white” looks like under whatever light hits the sensor. That guess determines how every other color renders.
Skin tones, product colors, backgrounds: all of it depends on whether your camera’s white balance matches the Kelvin of your lights.
The problem? Cameras guess wrong constantly. And when they do, faces go orange, white shirts turn gray, and your background shifts between blue and yellow depending on what’s in frame.
The Kelvin Ranges That Matter for Creators
Not every Kelvin number matters for home video. Three ranges cover about 90% of what creators deal with:
- 2700K to 3200K is warm light, typical of household lamps and soft bulbs. Great for a cozy vibe, terrible if your camera expects daylight.
- 4000K to 4500K is neutral, often the sweet spot for desk setups where you want a balanced, calm look without strong warm or cool bias.
- 5000K to 6500K is daylight range. This is the classic “YouTube talking head” look: bright, clean, and modern.
I would pick 4300K as a default over 5600K for home creators, and I know that goes against the standard advice.
The reason is simple: 5600K assumes you can control every light source in your room, and the typical home office has warm lamps, warm overhead fixtures, and warm practicals in the background that all fight against a 5600K main light.
A 4300K target cuts the gap between your video light and the room’s existing bulbs, so the color spill from mismatched sources is less extreme. That means less correction in editing and fewer ugly warm-cool splits across your frame.
How White Balance and Color Temperature Work Together
White balance is the camera setting that tells your device what “white” should look like under your current lighting. Color temperature is the light side of the equation. White balance is the camera side.
Auto white balance can work for casual stuff. But it drifts.
Mid-recording, if a screen changes brightness behind you, or if you hold up a colored object, auto white balance will shift your skin tone. That shift is visible when you cut clips together, and it looks amateurish.
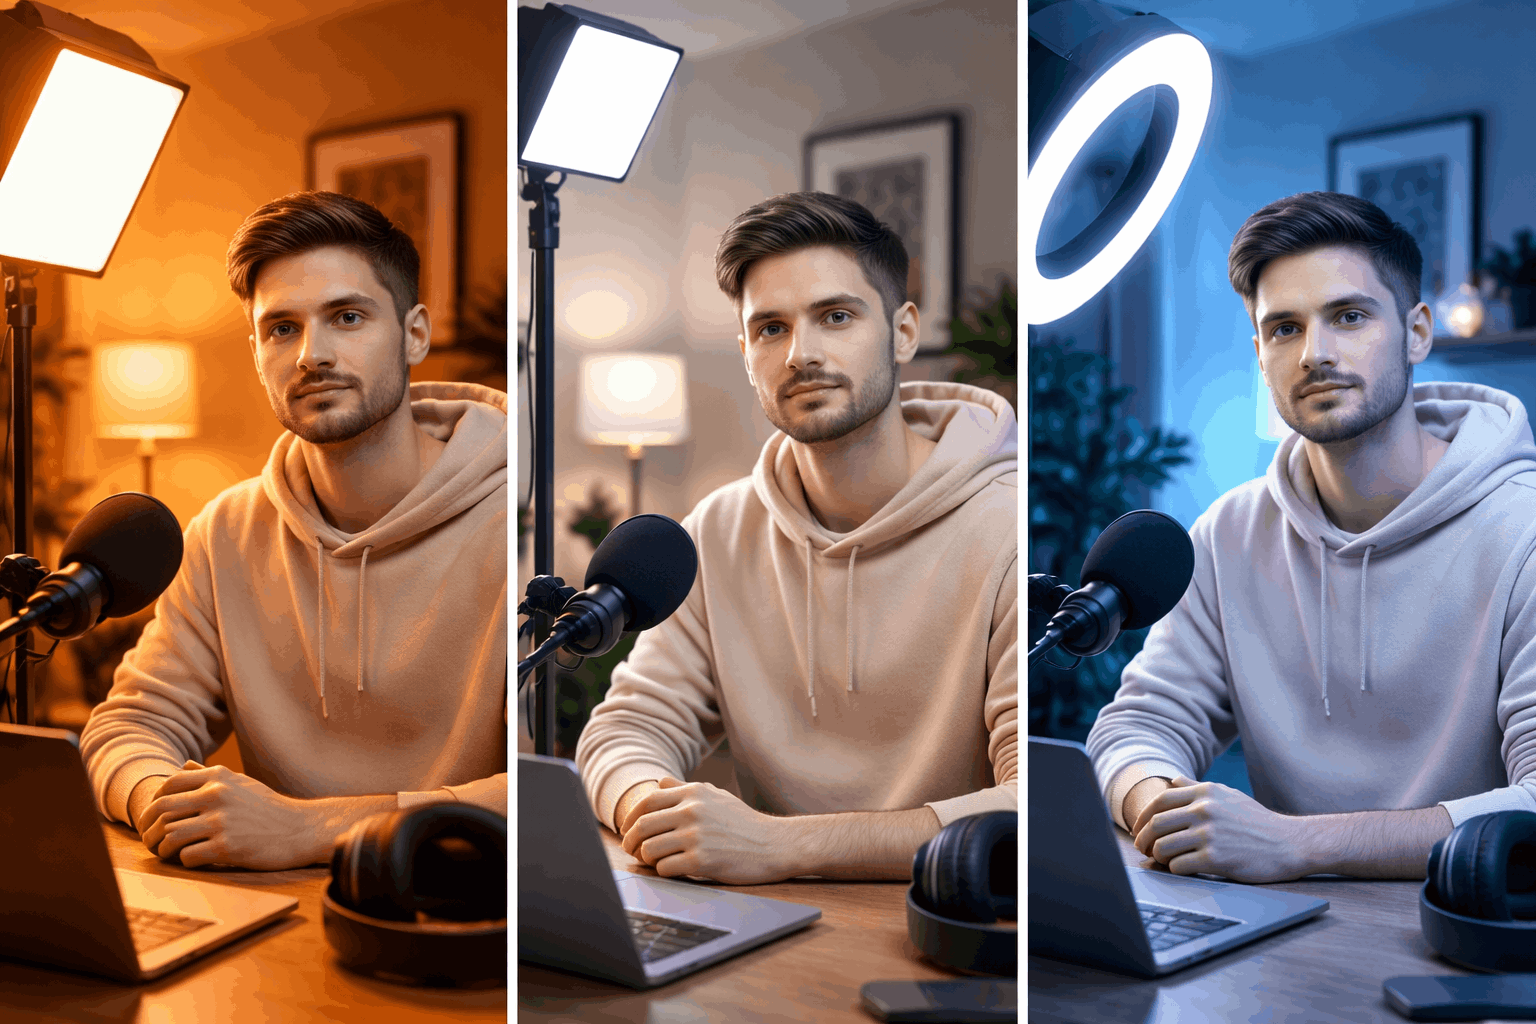
A stable home setup looks better when you set white balance once to match your light’s Kelvin rating, then lock it for the entire session.
Choosing the Right Lights for Home Video
The brightness of a light tells you how much light hits your face. The Kelvin rating tells you what color that light will be. Two lights at identical brightness can make your footage look completely different if their Kelvin values are 3000K and 6000K.
For creators, the simplest goal is one main color temperature across all light sources, then building the whole room around that single number.
Ring Lights vs LED Panels vs Bulbs
Each light type has trade-offs that go beyond price. The comparison matters when your goal is consistent color temperature across your entire frame.
| Light Type | Kelvin Control | Best Use Case | Limitation |
|---|---|---|---|
| Ring light | Usually fixed or limited range | Front-facing webcam, beauty content | Creates flat lighting as the only source |
| LED panel (bi-color) | Adjustable, often 2700K to 6500K | Side lighting for depth and shape | Cheap panels can have poor color accuracy even at the “right” Kelvin |
| Adjustable LED bulb | Set to specific Kelvin, stays there | Background practicals, fill light | Needs other room lights turned off or matched |
The LED panel gives the most control if your budget allows one that dials in specific Kelvin values.
But here is the detail that trips people up: a cheap bi-color panel might read 5600K on its dial and still produce a greenish or magenta tint because the LEDs have poor color rendering.
A $30 panel and a $120 panel set to the same Kelvin can produce noticeably different results on skin tones. Kelvin number alone does not tell the full story.
Also read: Home Studio Setup for Voice and Video
Picking One Default Temperature and Committing
I think the biggest mistake home creators make is switching their Kelvin target between recordings.
A viewer watching three of your videos back to back should see a consistent look. That consistency comes from picking one color temperature and sticking with it across sessions, not just within a single recording.
If you want a modern, bright feel, 5600K works as long as you can match every other light source to it. If you want something warmer and more relaxed, 3200K gives a filmic, cozy quality.
And if your room has mixed lighting you cannot fully control, that 4300K neutral zone reduces the extremes and makes your footage easier to balance in post.
Mixing Light Sources Without Wrecking Your Colors
Mixed color temperatures are the single biggest reason home videos look yellow in one corner and blue in another. A camera can only balance for one “white” at a time, so anything lit by a different Kelvin source shifts color.
The easiest fix is to remove or replace lights that don’t match your main Kelvin number. But not everyone can do that, especially when windows are involved.
Window Light and Room Lamps: The Classic Clash
Window light reads as cooler daylight, usually around 5500K to 6500K depending on weather and time of day. Room lamps typically sit at 2700K to 3000K. That gap creates the orange-and-blue split across your frame.
Two solutions, depending on when you record:
- Daytime recording: Turn off room lamps or swap their bulbs for daylight-rated LEDs so everything matches the window light coming in.
- Nighttime recording: Block window reflections, shut off any daylight-balanced sources, and build a warm setup from your video lights and room lamps. Consistency matters more than which temperature you pick.
- Mixed/uncontrollable light: Close blinds partially to reduce the window’s contribution and let your video light dominate the scene.
Gels and Diffusion for Budget Fixes
A CTO (Color Temperature Orange) gel taped over a daylight LED warms it to match tungsten room lamps.
A CTB (Color Temperature Blue) gel does the reverse, cooling a warm light to match daylight. Gels cost a few dollars and solve mismatches without buying new lights.
Diffusion is a separate tool. It softens harsh LEDs so skin looks smoother, but it does not change Kelvin in any meaningful way. If your light is too harsh and the wrong color temperature, you need both a gel and diffusion.
Bi-color LED panels make gels less necessary since you can dial the Kelvin directly. But gels still have a purpose for fixing practical lamps that sit in the background of your shot: a desk lamp or bookshelf light that would otherwise throw off your color balance.
A Pre-Recording White Balance Routine That Saves Hours in Editing
Skipping white balance before recording is like skipping focus before a photo. Everything that follows inherits the mistake, and fixing it in post takes far longer than getting it right up front.
The routine takes about 60 seconds and saves hours of color correction work across a full editing session. Every light you plan to use should be on before you adjust anything, including background lamps and practicals.
Place something neutral in frame: a gray card or a plain white sheet of paper. Look at it on your camera’s screen or webcam preview. Does the paper look tinted? If it’s warm, your white balance is too cool. If it’s blue, too warm. Adjust until the paper looks neutral.
Then set your white balance to match your light’s Kelvin, record a 10-second test clip, and keep that clip as a reference when you sit down to edit later. If your webcam software allows manual Kelvin input, set it and disable auto adjustments.
If it doesn’t, try the “Daylight,” “Tungsten,” or “Fluorescent” preset that gets closest to your setup and test each one against your gray card.
That test clip does something no preset can: it gives you a visual anchor point for your editing session. Drag it into your timeline first, match your other clips to it, and your color stays consistent across the entire video.
I think this single habit separates creators whose footage looks polished from creators who spend weekends fighting color correction in DaVinci Resolve or Premiere Pro.
Questions People Ask About Color Temperature for Home Video
Q: What Kelvin is best for YouTube videos?
5600K is the popular pick for a clean, bright YouTube look. But 4300K can be a better starting point if your room has warm ambient light you cannot control, because it reduces the color conflict between your video light and the room.
Q: Does color temperature affect how my skin looks on camera?
Absolutely. If your white balance and light Kelvin don’t match, skin tones shift orange or blue. This matters even more for creators with darker skin, where incorrect white balance can muddy the complexion instead of rendering it accurately.
Q: Can I fix color temperature in editing instead of getting it right on set?
Fixing in post is possible but time-consuming, and it degrades image quality slightly because you’re pushing pixel data around. Getting it right at the source keeps your footage cleaner and your editing sessions shorter.
Q: Do I need expensive lights to get good color temperature?
Price matters less than consistency. A $15 LED bulb at the right Kelvin, matched to your camera’s white balance, will outperform a $200 panel set to the wrong temperature. Check the Kelvin rating on the packaging specifications from your bulb manufacturer before buying, and test against a gray card like the ones available from X-Rite for color calibration.
Q: Does ring light color temperature matter if I only film with a webcam?
It matters just as much. Webcams have smaller sensors and weaker auto white balance than standalone cameras, making them more sensitive to Kelvin mismatches. Lock the ring light to one temperature and match your webcam’s white balance preset to it.
Conclusion
Consistent color temperature separates amateur-looking footage from clean, watchable home video every single time. Lock your Kelvin, match your white balance, and stop letting auto settings make creative decisions for you.
The 60-second routine of testing before each session pays back in hours saved during editing. One number, applied everywhere, is the whole trick.










