Natural-looking light can make home recordings feel cleaner, warmer, and more professional. It helps your camera show accurate skin tones, clearer details, and a more inviting background.
This matters for creators recording podcasts, videos, lessons, livestreams, music sessions, or remote work content.
You do not need expensive studio gear, but you do need a setup that softens harsh light and stays consistent.
Why Natural-Looking Light Matters?
Lighting affects how viewers read your face, space, and overall production quality. A good microphone can make your voice clear, but poor lighting can still make the video feel unfinished.
Most phones, webcams, and cameras perform better when the light is soft and controlled. The goal is to help the camera work less and capture a more natural image.
It Improves Video Clarity
Bad lighting often creates grain, muddy shadows, or blown-out highlights. When the room is too dark, the camera brightens the image digitally, which can make footage look noisy.
Soft light on the face helps the camera capture cleaner detail without heavy correction. This is especially useful for HD and 4K recordings where small flaws are easier to notice.
It Makes the Setup Feel More Welcoming
Natural-looking light makes a home setup feel comfortable instead of harsh or staged. It can bring out the texture of a microphone, instrument, desk, or background without making the frame look busy.
In interviews, lessons, or talking videos, softer light also helps expressions look more natural. Viewers may not notice the lighting directly, but they can feel when the image is easier to watch.
Also Read: Best Microphones for Podcasts Recorded at Home

Start With the Light Already in Your Room
Before buying any lighting product, test the light you already have. Many rooms have one useful window, lamp, or wall reflection that can become part of a simple setup.
Small changes in position often improve the image more than adding more gear. Once you understand your room, it becomes easier to choose what needs upgrading.
Use Window Light Carefully
A window can act like a large soft light when you sit near it and face it at a slight angle. This works better than placing the window behind you, which can darken your face and overexpose the background.
If sunlight is too strong, soften it with a sheer curtain, white sheet, or thin fabric. Try recording at a similar time of day so the light looks more consistent across your videos.
Avoid Mixed Light Sources
Mixed lighting happens when daylight, warm bulbs, ceiling lights, and colored lamps appear in the same scene. Your eyes may adjust to this in person, but the camera often shows strange color shifts.
Turn off extra lights first, then add only the light sources you can control. A simpler lighting mix usually creates more natural skin tones and easier editing.
Build a Simple Indoor Lighting Setup
A natural-looking setup does not have to copy a professional studio. It only needs one clear main light, softer shadows, and a background that supports the subject.
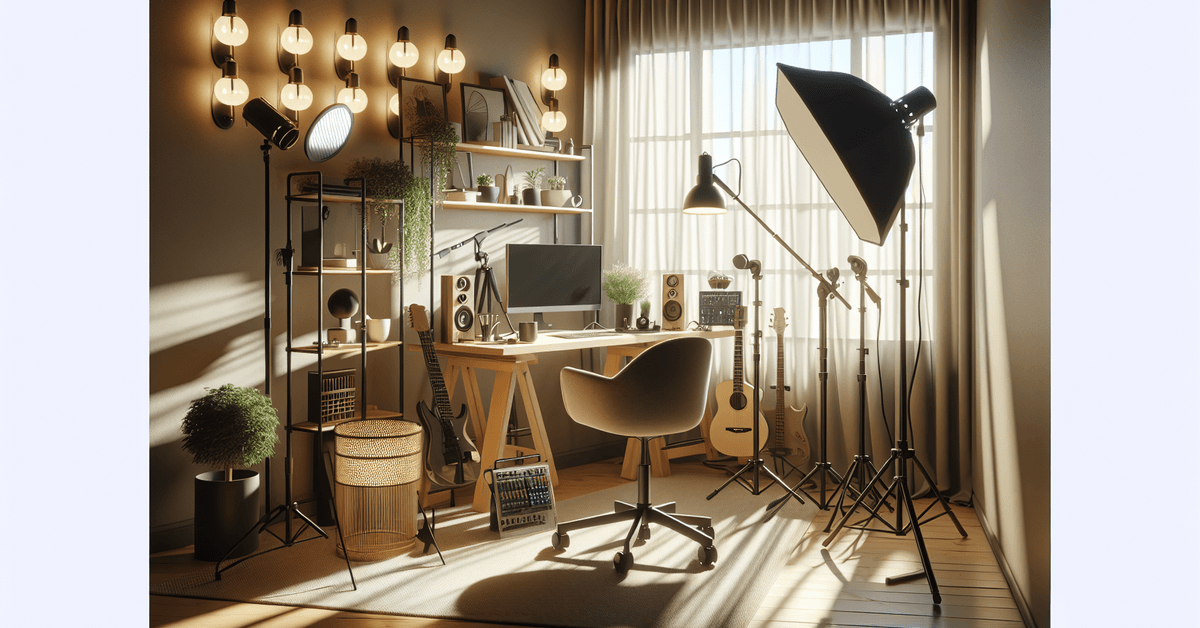
You can use a window, LED panel, softbox, lamp, or reflector depending on what your space allows. What matters most is repeatable placement, not the number of products.
Choose a Practical Main Light
A good main light should be adjustable, quiet, and soft enough for faces. LED panels are useful for desks and small rooms because they are compact and easy to control.
A softbox or diffused COB light can create a smoother look, but it may need more space. Ring lights can work for quick face-focused videos, though they may look flat if used directly in front.
Soften Shadows With Simple Tools
You do not always need a second light to fix shadows. A white wall, foam board, reflector, or even a light-colored sheet can bounce light back onto the face.
This helps reduce harsh contrast without making the image look overlit. Keep the fill subtle so the face still has some shape and depth.
Use this quick lighting check before recording:
- Make sure your face is brighter than the background.
- Check for harsh shadows under the eyes, nose, and chin.
- Remove mixed light sources that change skin tone.
- Look for glare on glasses, microphones, instruments, or screens.
- Record a short test clip before filming the full session.
Match the Lighting to the Content
Different recording styles need slightly different lighting choices. A podcast video may only need soft, steady face lighting, while a product demo needs detail on the item being shown.
Music recordings may benefit from a warmer background, as long as the performer remains clear. Matching the lighting to the content helps the viewer focus on what matters.
For Talking Videos and Livestreams
Talking videos usually work best with soft light slightly above eye level and placed a little to one side. This keeps the face clear while avoiding a flat, washed-out look.
A small background lamp can add depth, but it should not be brighter than the subject. If you stream for long periods, avoid lights that create heat or glare near your eyes.
For Products, Instruments, and Desk Setups
Product shots need light that shows texture, shape, and labels clearly. Side lighting can reveal details better than flat front lighting, especially for microphones, instruments, tools, or desk items.
If screens or glossy surfaces reflect too much light, move the light higher or soften it more. Always check the object on camera because reflections often look different through the lens.
Keep Color and Exposure Consistent
Natural-looking light depends on color as much as brightness. If one video looks warm and the next looks blue, the channel can feel less polished.
Consistent exposure also helps because skin, clothing, and background details stay easier to see. A few simple camera habits can prevent major editing problems later.
Lock White Balance When Possible
Auto white balance can shift during recording when you move, hold up an object, or change screen brightness. If your camera or app allows it, set white balance manually once the image looks natural.
Daylight-style settings often work well with window light or daylight-balanced LEDs. Warmer settings can work too, but all lights should stay in the same general color range.
Watch Exposure on the Face First
The face should usually be the clearest part of the frame. If the background is brighter than your face, viewers may feel distracted without knowing why.
Lower the background brightness, move away from the window, or add soft light to the front. Protect highlights so skin does not look shiny or washed out.
Conclusion: Make Your Lighting Easy to Repeat
A good lighting setup should not take too much effort every time you record. Save your best light position, camera angle, and brightness settings so you are not guessing during the next session.
Take a quick test clip whenever the weather, time of day, or room layout changes. Natural-looking light works best when it feels soft, stable, and easy for your real routine.