A beginner home studio is simply a quiet corner where your voice looks and sounds clear, your workflow feels easy, and you can hit record fast without stress.
You do not need a perfect room or expensive gear to start, but you do need a basic plan for light, sound, framing, and file storage.
The goal is consistency, so you can publish regularly while improving small pieces of your setup as you learn what your content actually requires.
Beginner Considerations in Home Creation
Before buying anything, decide what you will make most often, because each format needs a different mix of audio, lighting, and camera equipment.
Decide between options such as talking-head videos, voiceovers, livestreams, tutorials, podcasts, or product demos
Your room matters as much as your gear, so choose a spot with controllable noise, fewer echoes, and enough distance behind you.
Your time matters too, so your setup should allow quick starts, repeatable camera angles, and stable lighting.
Your budget
It should prioritize the biggest quality jumps first.
These are usually microphone clarity, stable lighting, and a simple editing workflow you can repeat without getting overwhelmed.
What a beginner must avoid in their home setup
Avoid building around the camera alone, because sharp video with bad audio feels unprofessional fast, and viewers will leave sooner.
Avoid placing your desk against a hard, bare wall with no soft materials nearby, because it adds echo, and microphones sound thin and distant.
Avoid buying too many cheap accessories at once, because clutter slows you down, increases troubleshooting, and makes it harder to learn.
How to Arrange Your Home Setup Being a Beginner
Start by picking one “recording position” that stays the same, so your camera, microphone, and light can stay roughly set.
Control sound first with simple choices, like closing windows, turning off loud fans, adding a rug or blanket, and placing soft items.
Make your background simple and intentional, using a tidy shelf, a plain wall, or a curtain.
Keep a small gap between you and the background to reduce shadows and distractions.
Best Gear for Content Beginners
Good beginner accessories are the ones that reduce friction.
This includes a simple pop filter, a mic arm or stand that holds position, a pair of closed-back headphones, and a small external drive.
Mic
A USB dynamic microphone is a strong beginner choice.
It reduces room echo better than many cheap condensers, it connects easily, and it makes speech sound fuller when you speak close and steady.
Light
A basic softbox or LED can produce clean, flattering light, and if you add a second smaller light or lamp you can soften shadows without complexity.
Camera
A smartphone or entry-level camera on a stable tripod is enough for most starters.
The real upgrade comes from locking focus, using the rear camera when possible, and keeping the shot stable with a consistent distance.
Best Practices for Content Beginners
Record a short “test clip” before each session, then listen with headphones for noise, echo, and volume balance.
A 20-second check can prevent an entire video from being unusable.
Use a repeatable checklist, like lights on, camera angle set, mic distance fixed, phone on silent, and notifications off.
Predictable routines reduce anxiety and make your output more consistent.
Keep your editing simple at the start
Focus on clean cuts, readable titles, and basic audio cleanup.
Complicated effects can slow you down and often hide weak fundamentals instead of improving them.
Ideas for Beginner-Friendly Home Studio Setup
Here are beginner-friendly home studio setup ideas you can copy fast, even in a small space.
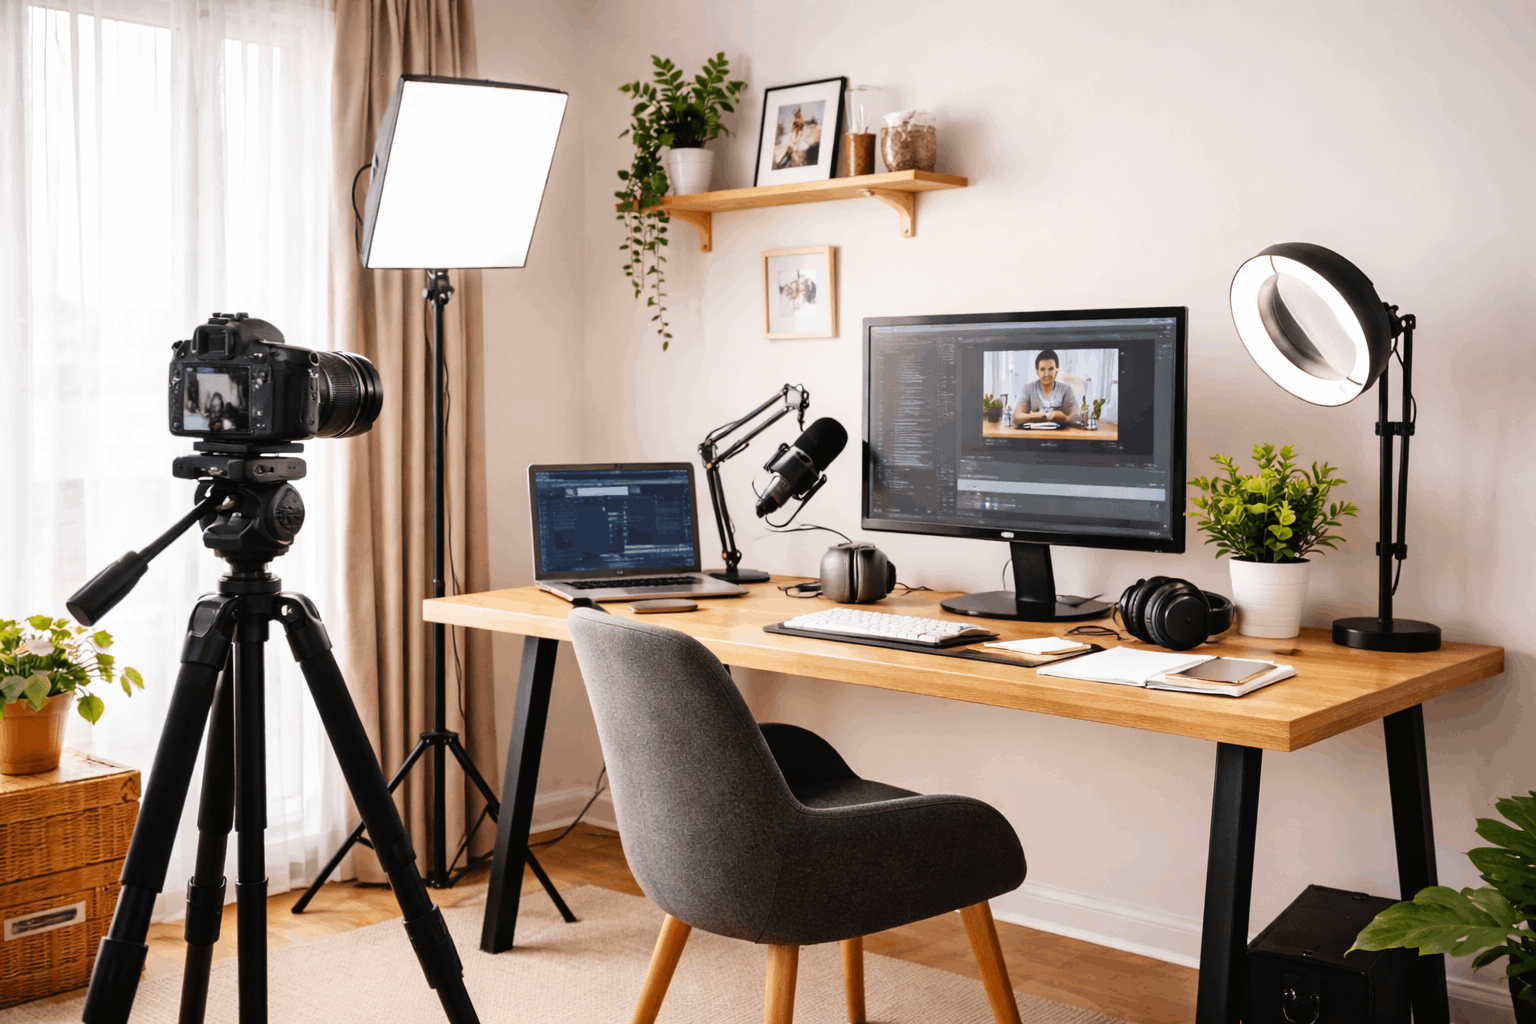
- Desk Corner “Talking-Head” Setup: Use one clean wall or a tidy shelf behind you, a tripod at eye level, and one key light at 45 degrees.
- Window-Light Setup (No Light Purchase): Face a window for soft light, close curtains slightly if it’s too harsh, and use a white wall or sheet as a simple background.
- Closet or “Soft Room” Audio Setup: Record voiceovers near hanging clothes or soft furniture to reduce echo, with a USB mic close to your mouth.
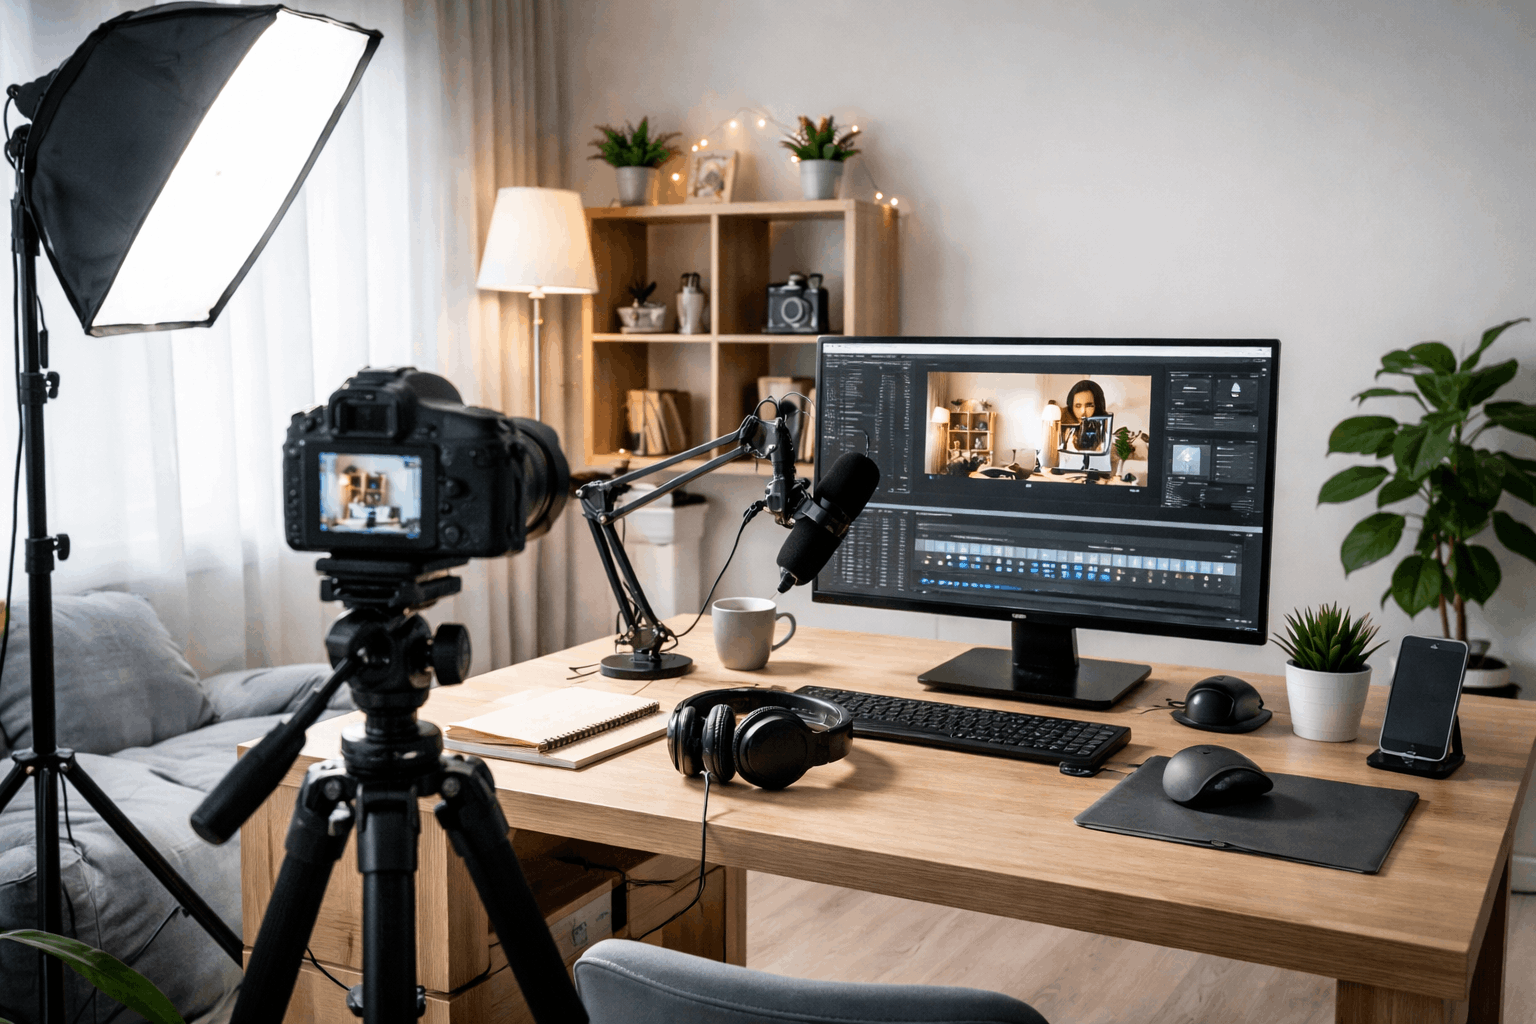
- Minimal Podcast Setup: One USB dynamic mic, headphones, and a small stand on your desk, with a notebook to keep your outline visible.
- Overhead “Top-Down” Desk Setup: Mount a phone above your desk for tutorials or crafts, use two lamps angled from both sides, and keep the surface uncluttered.
- Bedside/Small Room Setup: Use a compact tripod and a small LED panel, and hang a simple curtain behind you to hide distractions.
- Mobile Creator Setup: Keep a “grab-and-go” kit: phone tripod, clip-on light, lav mic, and a small pouch, so you can record anywhere at home.
- Livestream Starter Setup: Use an ethernet cable if possible, a ring light or softbox, and a simple background, then test audio levels before going live.
- “Two Zones” Setup (Record + Edit): Record in the quietest corner, edit at your usual desk, and keep a small checklist so setup stays consistent.
- Low-Noise Setup for Apartments: Record at quieter hours, turn off fans/AC briefly, put a rug down, and move the mic closer to reduce background noise.
For TikTok/Reels/YouTube Shorts, you use a smartphone, natural light or one small light, and a mic that makes speech clear.
For YouTube talking-head, tutorials, product reviews, and beginner livestreams.
You record from a desk with repeatable framing and consistent lighting.
For long-form YouTube, podcasts, interviews (single person), and frequent uploads.
It focuses on clean sound, stable lighting, and less troubleshooting.
Conclusion
A beginner-friendly home studio works when it supports your habits, keeps your sound clear, and lets you record often without needing to rebuild your setup every time.
If you prioritize audio, stable light, and a repeatable layout, you can create content that feels professional even with modest gear and a small space.
As you grow, upgrade only after you can name the problem you are solving, because that keeps your spending focused and your workflow calm.


