Good lighting is one of the fastest ways to make your videos look more professional, even if you’re using a basic webcam and a simple microphone.
Placement matters more than price because where your light sits controls shadows, skin tone, background separation, and how clean your image looks.
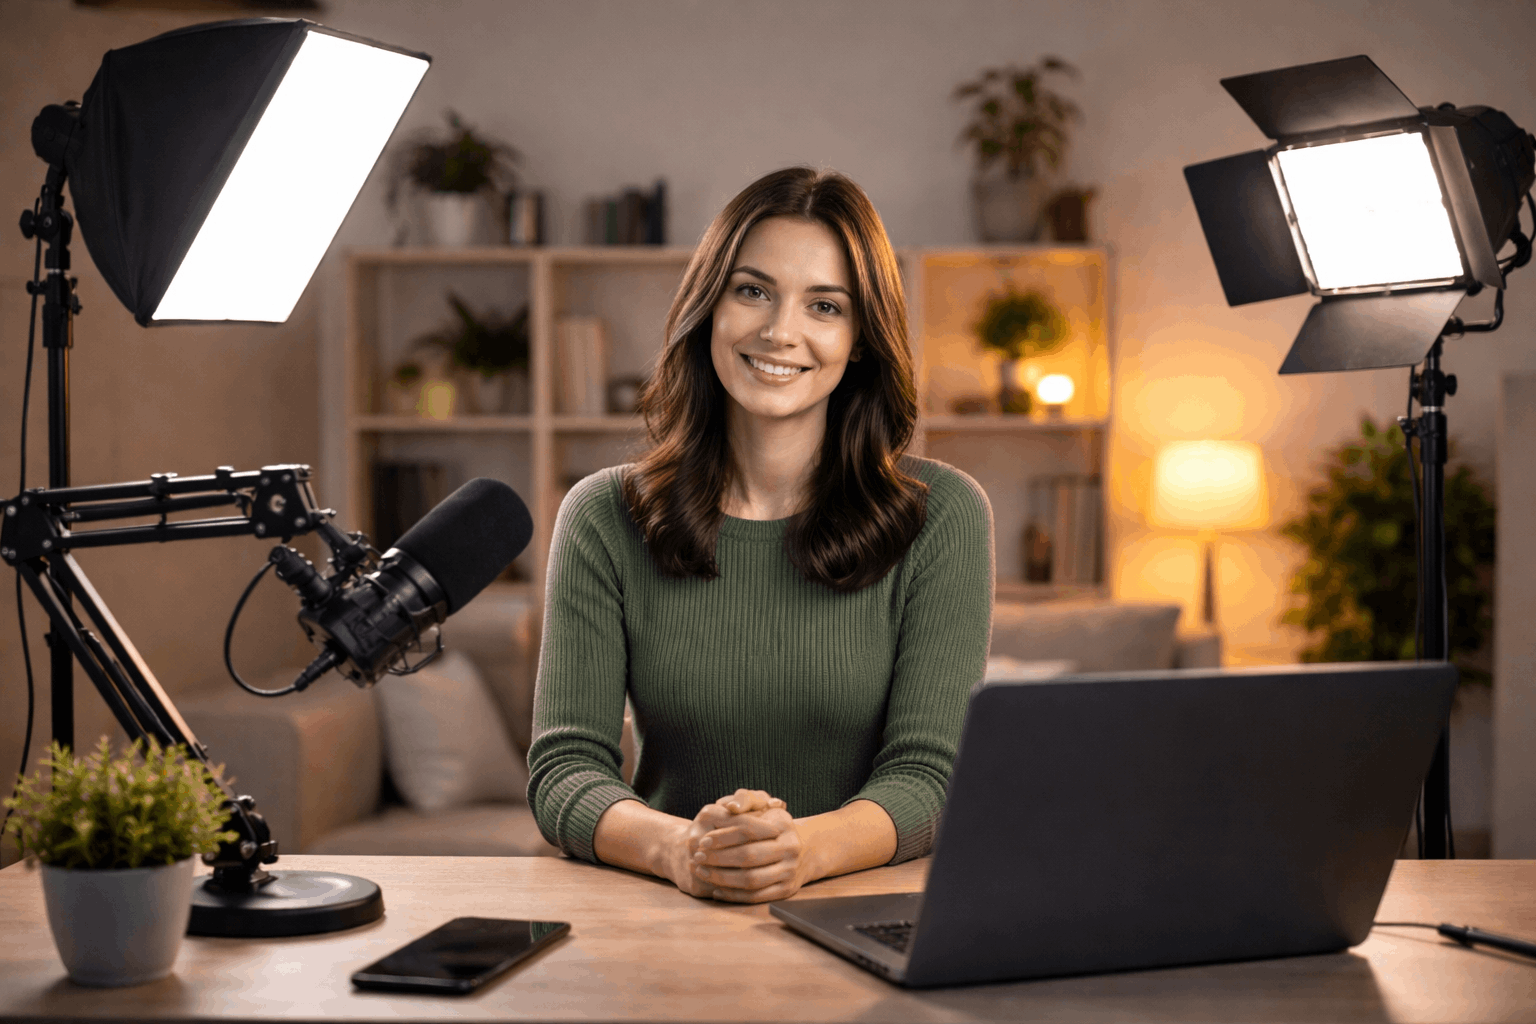
This guide focuses on practical lighting placement for everyday creators building simple home setups with a webcam or camera, a tripod, and a mic.
The easiest placement win: move the light, not the camera settings
If your video looks noisy or grainy, the best fix is usually more light on your face—not cranking ISO or adding heavy filters.
A simple rule: a light closer to you appears brighter than the same light farther away.
This is tied to the inverse square law, where intensity drops quickly as distance increases.
Practical placement tip
If your face is dim, bring the light closer first (while keeping it out of frame), then adjust brightness/dimming as needed.
If the light is too harsh up close, diffuse it (softbox, umbrella, diffusion cloth) or bounce it off a wall/reflector rather than pushing it far away.
One-light setup that looks good fast
If you only have one light (ring light, small LED panel, or a softbox), use it as a key light—your main source.
Key light placement (beginner-friendly)
Place the light slightly above eye level, angled down toward your face.
Put it 30–45 degrees to the left or right of the camera, not directly on-axis.
Start with the light about 60–90 cm away, then adjust based on brightness and softness.
This angle creates natural-looking shadows that give your face shape without looking dramatic. If you place the light directly in front of you, the image can look flat and may increase glare on glasses.
Ring light placement (when you’re using a webcam)
Ring lights are popular because they’re simple, but placement still matters:
Put the ring light as close to the lens as possible (centered around or just behind the webcam).
Raise it slightly so it’s just above eye level, angled down.
Keep it dim enough to avoid shiny skin and blown highlights.
If you wear glasses, move the ring light slightly off-center or raise it more to push reflections out of the lens.
Two-light setup: add a fill to control harsh shadows
If your key light creates a strong shadow on one side of your face, a second light (or even a reflector) becomes your fill.
In three-point lighting, the fill’s job is not to remove shadows completely, but to soften them.
Fill light placement
Place the fill on the opposite side of the key, closer to the camera axis. Keep it dimmer than the key so you still have natural depth.
If you don’t have a second light, use a white foam board or reflector to bounce key light back into the shadows.
A common starting point is a 2:1 key-to-fill brightness ratio, meaning your key is about twice as bright as your fill.
Three-point lighting: the classic placement that adds depth
Three-point lighting uses key, fill, and back light (hair/rim light) to separate you from the background and add dimension.
Place a small light behind you, off to one side, aimed at the back of your head and shoulders.
Raise it higher than your head and angle it down. Keep it subtle—too bright looks artificial and distracts.
If you don’t have a third light, you can sometimes “fake” separation by keeping distance from the background and slightly darkening the wall behind.
Background lighting: keep it intentional, not random
A beginner mistake is lighting the room evenly. That can make the shot look like a bright office rather than a focused video scene.
Instead, light the subject first, then decide what the background needs.
Simple background placement ideas
Put a small lamp or LED light in the background off to the side, not directly behind your head.
Aim a soft light at the wall to create a gentle gradient instead of a harsh spotlight.
If your background is messy, reduce its brightness and keep your face clearly lit.
Color temperature: avoid mixed lighting when you can
Color temperature affects whether your image looks warm (yellow/orange) or cool (blue).
It’s measured in Kelvin (K), and common video ranges include warm indoor tones around 3200K and daylight around 5600K.
Beginner rule that prevents headaches
Pick one main color temperature and stick to it.
If your key light is daylight (around 5600K), avoid mixing it with warm household lamps unless you deliberately want that look.
If mixed lighting is unavoidable, turn off competing lights or match your lights as closely as possible, then set your camera/webcam white balance.
Light quality: why CRI and TLCI can matter on camera
If skin tones look odd (greenish, gray, or “off”) even when your exposure is fine, the issue can be light quality.
CRI is a measure of how faithfully a light source reveals colors, and TLCI is a camera-focused metric often used for video lighting.
If you’re shopping for an LED panel or key light for recording, high CRI/TLCI ratings are often a good sign you’ll get more natural color on camera.
Lighting placement with microphones and webcams
Lighting placement should also respect your audio gear and framing:
If your mic is on a boom arm, place your key light so it doesn’t cast a hard mic shadow across your face or background.
If you use a desk mic, watch for reflections if the mic body is glossy.
If your webcam struggles in low light, prioritize a bright, soft key light close to your face rather than lighting the entire room.
Tripod tip
Once your camera angle is locked, adjust lights around that frame.
Constantly moving the camera to “fix” lighting usually creates new problems (bad angles, awkward framing, or more background clutter).

Common beginner problems and quick fixes
Problem: Shiny forehead or blown-out face
Fix: Lower brightness, diffuse the key light, raise the light slightly, and angle it down.
Problem: Harsh shadow on the wall behind you
Fix: Move yourself farther from the wall, move the key light closer to you, and angle it so spill misses the background.
Problem: Flat, boring look
Fix: Move the key light off-camera (30–45 degrees) and add a dim fill or reflector.
Problem: Glasses glare
Fix: Raise the key light higher, move it farther to the side, or tilt glasses slightly downward.
Problem: Skin tone looks weird
Fix: Turn off mixed household lights, match color temperature, and check white balance. If the issue persists, consider a higher-quality light source (CRI/TLCI).
Wrap-up: placement beats gear when you’re starting out
You can get a clean, professional look with one light, a webcam, a tripod, and a decent mic if you place your key light well and control shadows.
Start simple, lock in a repeatable setup, and only add a second or third light when you know exactly what problem you’re solving.
The goal is consistency: a clear face, stable color, and a background that supports your content instead of competing with it.


