A solid content creator setup does not require a premium camera body or a studio full of gear.
For everyday home video and audio, the smartest under-$300 path is usually: clear voice first, simple lighting second, and a stable mount.
What “under $300” should realistically cover
Under $300 is enough to assemble a reliable starter kit that improves quality over built-in laptop or phone hardware.
The biggest jump comes from upgrading audio, because viewers tolerate average video more than they tolerate unclear speech.
A basic light and stable support then make your footage look intentional instead of accidental.
The goal here is not to chase perfection, but to build a repeatable workflow you can set up in minutes.
Microphones: the biggest quality upgrade per dollar
A dedicated microphone usually delivers the most noticeable improvement in a best budget creator kit.
Two common “easy” choices are a USB dynamic handheld mic for desk recording, or a wired lavalier for phone-first recording.
Either choice can work; the best pick depends on whether you record mostly at a desk or while standing/moving.
Option A: USB dynamic mic for desk creators (simple, forgiving)
The Samson Q2U is commonly used as an entry-level creator mic because it supports USB recording and can later be used with XLR gear if you expand your setup.
For a small room with reflections (bare walls, tile floors), a dynamic mic like this can be easier to manage than a sensitive condenser mic.
Pair it with a basic desk mounting solution so the mic stays close to your mouth without filling the frame.
Option B: Wired lav mic for phone-first creators (fast and low-cost)
If you film primarily on a smartphone and want a quick improvement without desk gear, a wired lavalier can be the simplest upgrade.
A lav mic keeps audio consistent even if you lean back or turn your head slightly, which helps with tutorials, cooking clips, and casual talking-head videos.
The tradeoff is cable management: you need to keep the cable from rubbing clothing or pulling on the mic capsule.
Optional mounting support for cleaner audio
A boom arm helps you place the mic close to your mouth while keeping the desk clear and reducing handling noise.
If you do not want a boom arm, a simple tabletop stand still works, but keeping the mic close (without blocking your face) is the practical goal.
Lighting: small changes that make video look “finished”
Lighting is where many creators overspend early.
You do not need a giant softbox to look better on camera; you need a consistent, controllable light source that reduces harsh shadows.
Ring lights and small desktop lights are popular because they are straightforward and compact.
Budget desktop ring light
For a small desk setup, the Neewer BASICS BR60 bi-color ring light kit with a desktop stand.
A light like this is not meant to flood a whole room, but it can lift your face exposure for webcam-style videos.
Place it slightly above eye level and off to one side for a more natural look than a straight-on “flat” ring-light look.
Stronger ring light option (still under budget)
If you want more output and a larger light source, use the RH10B 10-inch 20W LED ring light.
This is often easier for wider framing (upper torso, not just face) and for dim rooms.
The key is to keep it close enough to be effective without causing glare on glasses; small angle changes usually fix reflections.
Webcams: when you record from a laptop or desktop
If your workflow is mostly streaming, Zoom-style content,, or desk tutorials, a webcam can simplify setup and keep your phone free.
A reliable 1080p webcam is often “good enough” when paired with decent light.
Webcam quality depends heavily on lighting; a good light can make a “midrange” webcam look significantly better.
Tripods and mounts: stable framing without fuss
Stability is a quality signal. Even for casual videos, shaky framing makes a setup look improvised.
For phone-based content, you can start with a compact tripod that includes a phone holder.
Choose based on how you shoot: the Magnus-style tripod is for desk or table, while the GorillaPod is useful when you need creative mounting options.
Three complete setups under $300 (with real totals)
Prices below are based on the listed amounts in the cited sources and can change by retailer, region, or sales timing.
These kits assume you already have a phone or a computer to record with.
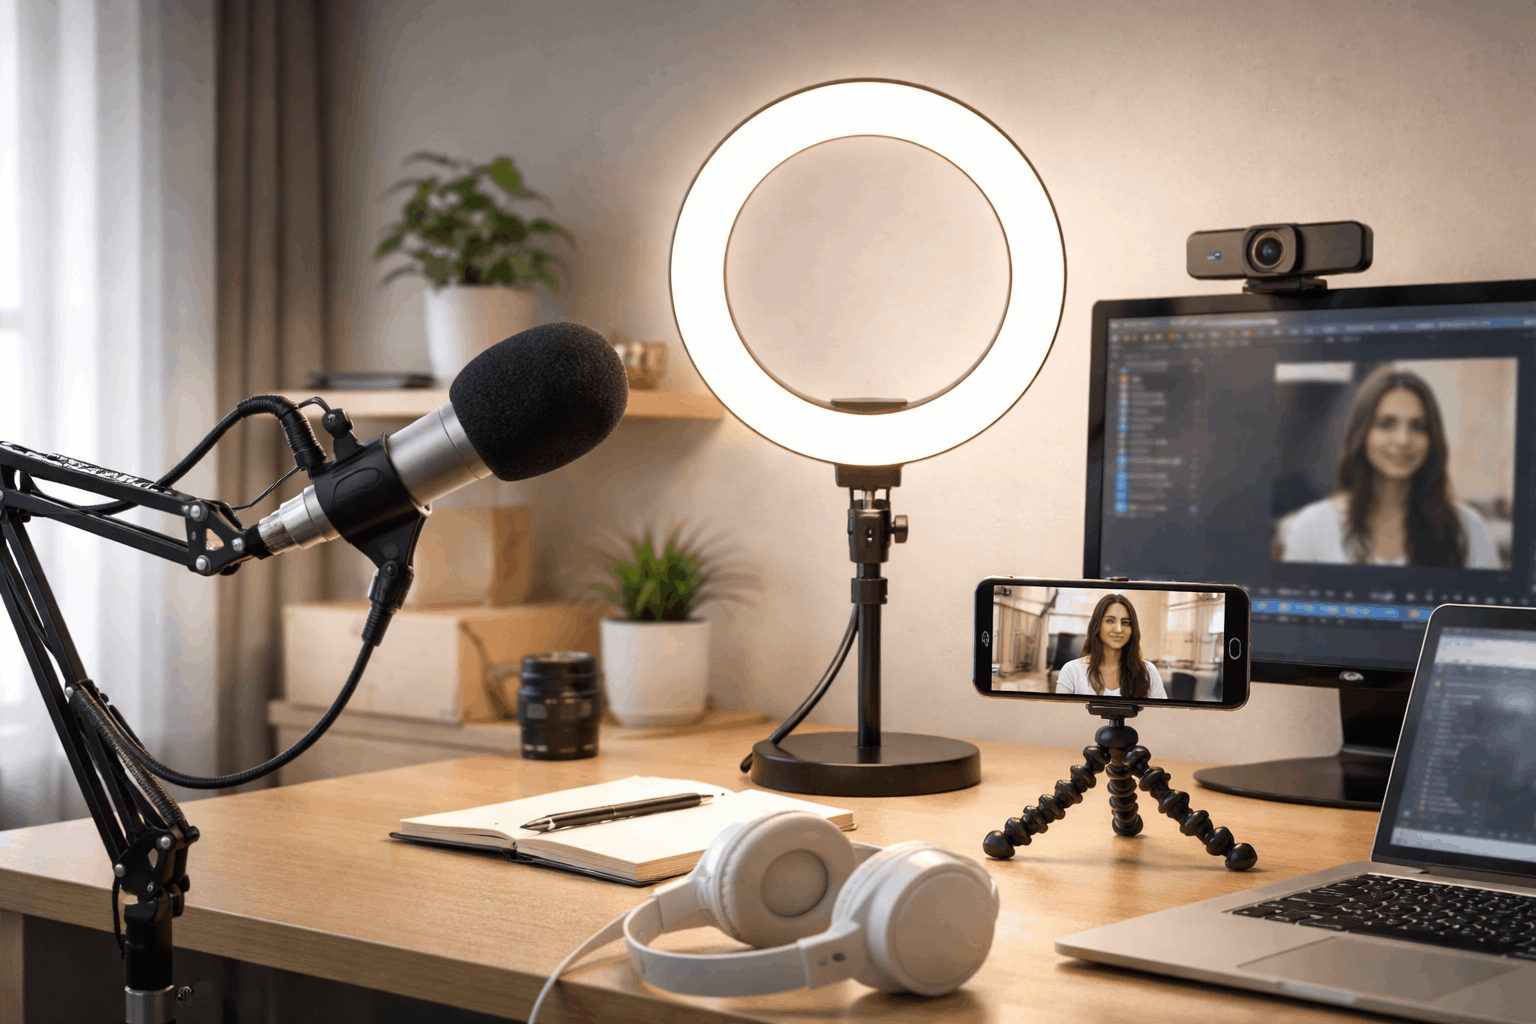
Setup 1: Desk Creator Kit (webcam + clear voice) — $217.96 total
You get stable framing, controlled lighting, and close-mic audio without complicated setup.
This is a strong “default” content creator setup for talking-head videos, podcasts, streaming, and course-style content.
- Logitech C920s webcam — $59.99 in B&H Photo Video
- Samson Q2U mic — $99.99 in B&H Photo Video
- TONOR T20 boom arm — $31.99 in TONOR
- Neewer BR60 desktop ring light — $25.99 in B&H Photo Video
Easy upgrade: swap the BR60 for the Neewer RH10B ring light ($89.99) to better support wider framing; the total becomes $281.96.
Setup 2: Phone-First Creator Kit (fast filming anywhere) — $121.89 total
Your phone camera does the imaging, the lav improves clarity, and the ring light gives consistent exposure.
It is a clean, low-stress budget content creation setup for reels, TikTok-style clips, and simple tutorials.
- BOYA BY-M1 lav mic — $14.95 in B&H Photo Video
- Magnus MTT-100 tripod with phone holder — $16.95 in B&H Photo Video
- Neewer RH10B 10-inch ring light — $89.99 in NEEWER
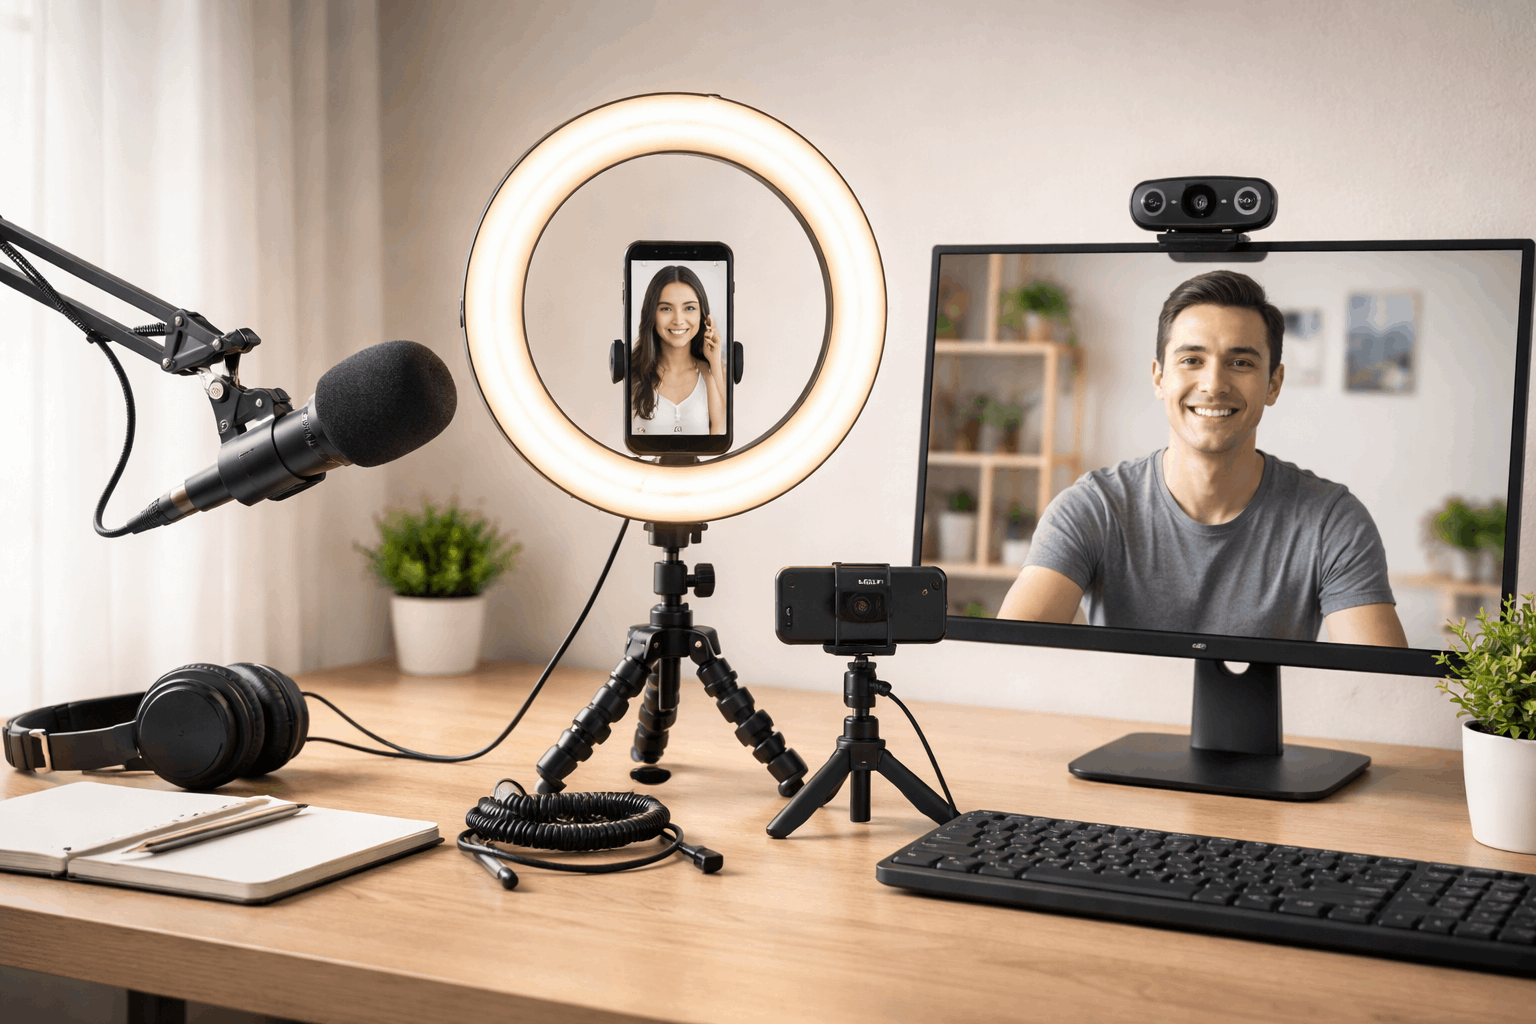
Setup 3: Hybrid Kit (phone video + “broadcast” style audio) — $157.88 total
You keep the phone’s camera flexibility, but you record cleaner audio with a creator-friendly mic.
This is useful if you want a more “studio voice” sound while still filming with a phone for convenience.
- Samson Q2U mic — $99.99 in B&H Photo Video
- Neewer BR60 desktop ring light — $25.99 in B&H Photo Video
- JOBY GorillaPod 1K kit — $39.99 in B&H Photo Video
Setup tips that matter more than buying more gear
Put the mic close enough that your voice is louder than the room.
Keep the light slightly above eye level and avoid placing it directly behind you, which can darken your face.
Frame your shot, lock your tripod position, and mark the floor or desk spot so you can recreate the same look quickly.
If you keep these basics consistent, your results will look and sound more professional than many expensive, poorly set-up rigs.
Final note on prices and reliability
Every item above is priced using listings from retailers or brand sites cited in this guide, and those numbers can change with sales or stock.
The simplest path is to choose one of the three bundles and start recording, then upgrade only when your workflow shows a clear limitation.


