Good audio is what makes a home video feel “watchable.”
Viewers will tolerate average video quality, but they click away fast when your voice is muffled, echoey, or hard to understand.
The right microphone helps your videos sound clear, consistent, and professional without needing a complicated studio.
Start With Your Recording Style
Before you compare models, get clear on how you film.
Your microphone choice should match how you move, how far you are from the camera, and what kind of space you’re in.
Talking-Head at a Desk
If you sit in one spot and speak directly to the camera, you can use a mic that stays close to your mouth and keeps your voice steady.
A USB microphone on a small stand or boom arm is a common choice for this setup.
It works well when your camera is on a tripod and your lighting is fixed.
Standing, Moving, or Demonstrating Products
If you move around, step back from the camera, or show items with your hands, a lavalier mic (clip-on mic) is often easier.
It stays with you, so your voice remains consistent even when your distance changes.
This is especially helpful for tutorials, cooking videos, DIY demos, and unboxing content.
Vlogs or Handheld Filming
If you film handheld or use a small camera, a shotgun microphone on the camera can be a good fit.
It aims forward and can reduce some background noise compared to using the camera’s built-in mic.
This style pairs well with a lightweight tripod or mini tripod for stability.
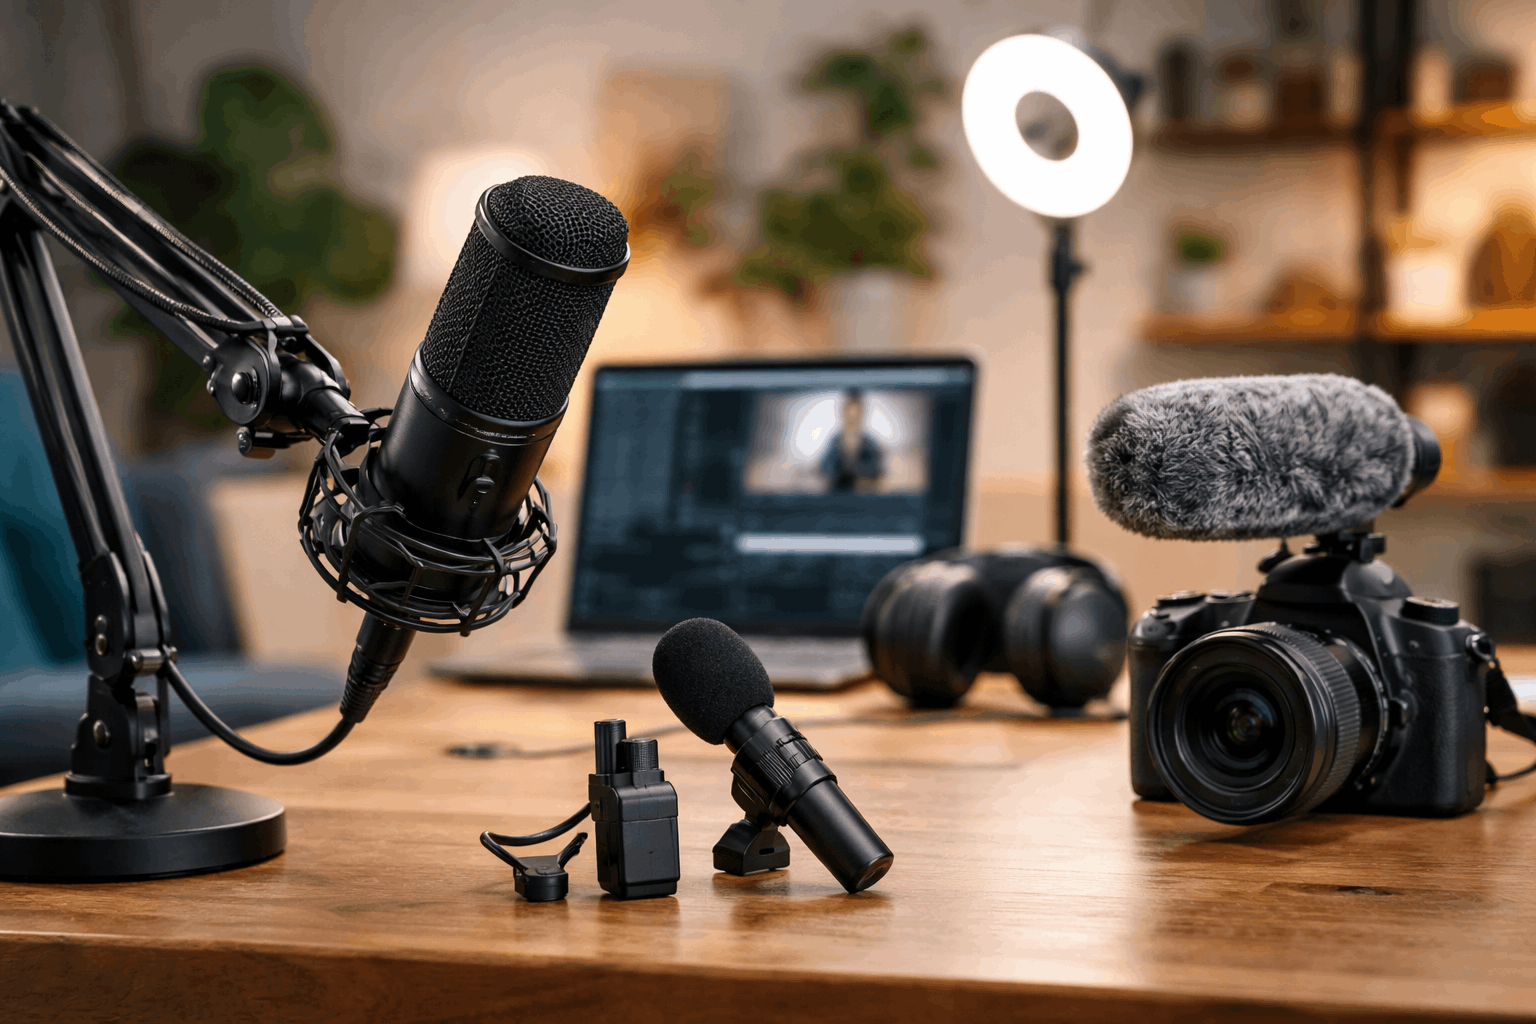
Understand the Main Microphone Types
Most creators choose from three main mic styles. Each one solves a different problem, so it helps to know what they’re designed to do.
USB Desktop Microphones
A USB mic plugs directly into your computer and is popular for YouTube videos recorded at a desk.
It’s simple, often sounds great for the price, and doesn’t require extra gear.
This is ideal if you record with a webcam or a camera while capturing audio on your computer.
Best for:
- Sit-down videos, commentary, streaming, and voiceovers
- Small home studios with controlled noise
- Creators who want a clean setup with fewer cables
Watch out for:
- Echo in untreated rooms
- Keyboard and mouse noise if the mic is too close to your desk
- Being too far from the mic, which makes the audio thin and roomy
Lavalier Microphones
A lavalier mic clips onto your shirt and keeps sound consistent when you move.
Lav mics can be wired or wireless, and they work well with phones, cameras, and some computers, depending on the connector.
For home creators, this can be a “set it and forget it” option.
Best for:
- Tutorials, demos, and videos where you move
- Small rooms where a desk mic would pick up too much echo
- Simple filming with a phone or camera on a tripod
Watch out for:
- Clothing rustles if the mic rubs against fabric
- Poor placement, which makes your voice sound dull
- Wireless setups that need battery management and careful pairing
Shotgun Microphones
A shotgun mic is a directional mic that captures sound mainly from where it’s pointed.
Many creators mount it on a camera or place it on a boom just out of frame. This is useful when you want clean audio without seeing a mic on screen.
Best for:
- Filming with a camera and staying mostly in place
- Cleaner “invisible mic” look
- Rooms where you can position the mic close to your mouth
Watch out for:
- Sound quality drops quickly if the mic is too far away
- Room echo can still be an issue
- On-camera shotgun mics are often farther from your mouth than you think
Choose the Right Connection: USB vs XLR
Your connection type affects how flexible your setup is and how easy it is to upgrade later.
USB: The Simple Choice
USB microphones are easy because they include their own audio interface. You plug them into a computer and record right away.
For many home creators, USB is the fastest path to better audio without extra gear.
Choose USB if you record on a laptop or desktop most of the time and want a quick setup with fewer accessories.
XLR: The Upgrade Path
XLR microphones connect to an audio interface or mixer, which gives you more control and usually better long-term flexibility.
This route costs more upfront, but it can be worth it if you plan to grow your channel and improve your audio chain over time.
Choose XLR if you want more control over gain and sound shaping and are building a more advanced home recording setup.
Pick a Mic Pattern That Matches Your Room
Microphones “listen” in different ways. The pattern affects how much background noise and room echo get into your recording.
Cardioid: The Safe Default for Home Creators
Cardioid mics focus on sound in front of the microphone and reduce sound from behind it.
This is a strong choice for YouTube videos in a typical home room. If you’re not sure what to pick, cardioid is usually the safest starting point.
Omnidirectional: Good for Consistent Movement
Omnidirectional mics capture sound from all directions.
Many lav mics are omni, which helps keep your voice stable even if you turn your head.
This can be useful, but it also means more room sound can be captured.
Supercardioid and Hypercardioid: More Focus, More Placement Sensitivity
These patterns can be more directional than cardioid, which can help in noisy spaces.
The downside is that they often require more careful positioning, and they can pick up sound from specific angles behind the mic.
If you’re new, start with cardioid unless you have a clear reason to go tighter.
Make Sure It Fits Your Full Setup
If you use a webcam, a USB mic is often the easiest match.
If you use a camera on a tripod, a shotgun mic or a lav mic can integrate smoothly.
If you rely on bright lighting, plan mic placement so you don’t create shadows on your face.
If you film in a small room, prioritize compact gear that stays out of your shot.
Conclusion
The best microphone is the one that matches how you record at home and keeps your voice consistently clear.
Focus first on your filming style, your room, and how close you can keep the mic to your mouth.
Then pick a mic type and connection that fits your workflow with webcams, tripods, and simple lighting setups.


