Creators often start with a webcam, a small light, and a microphone, then quickly discover that audio quality is what makes a video feel “professional.”
An audio interface is one of the simplest upgrades you can make when you want cleaner voice recordings.
This guide explains what an audio interface is, what it does, and how to choose one for common home setups.
What an Audio Interface Is
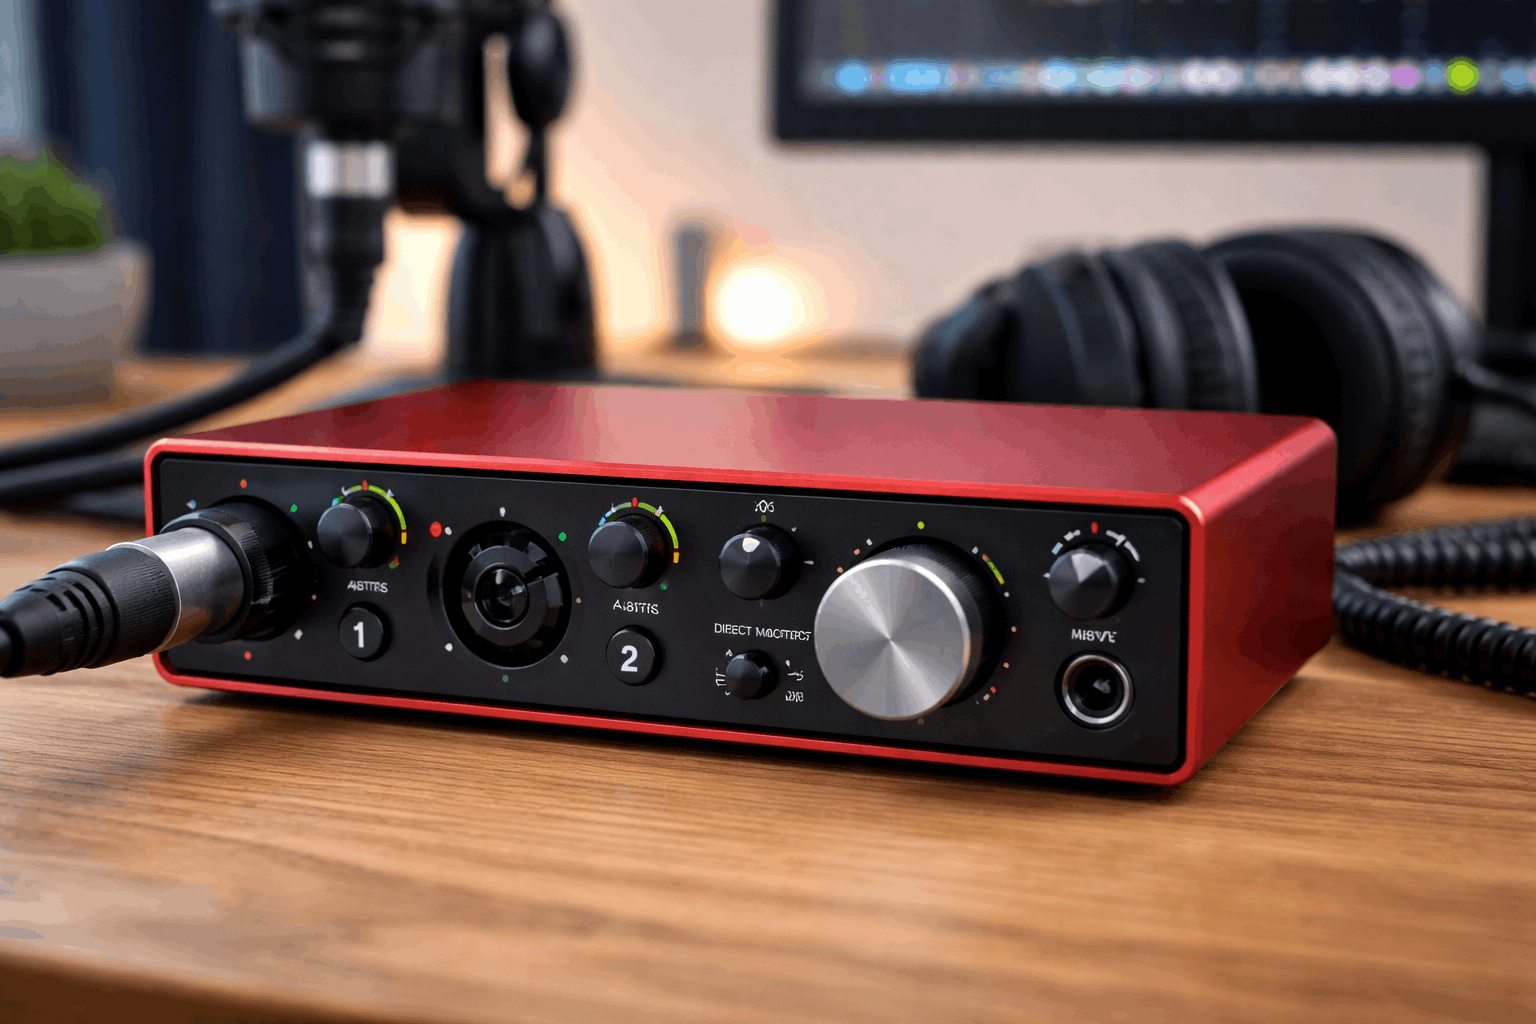
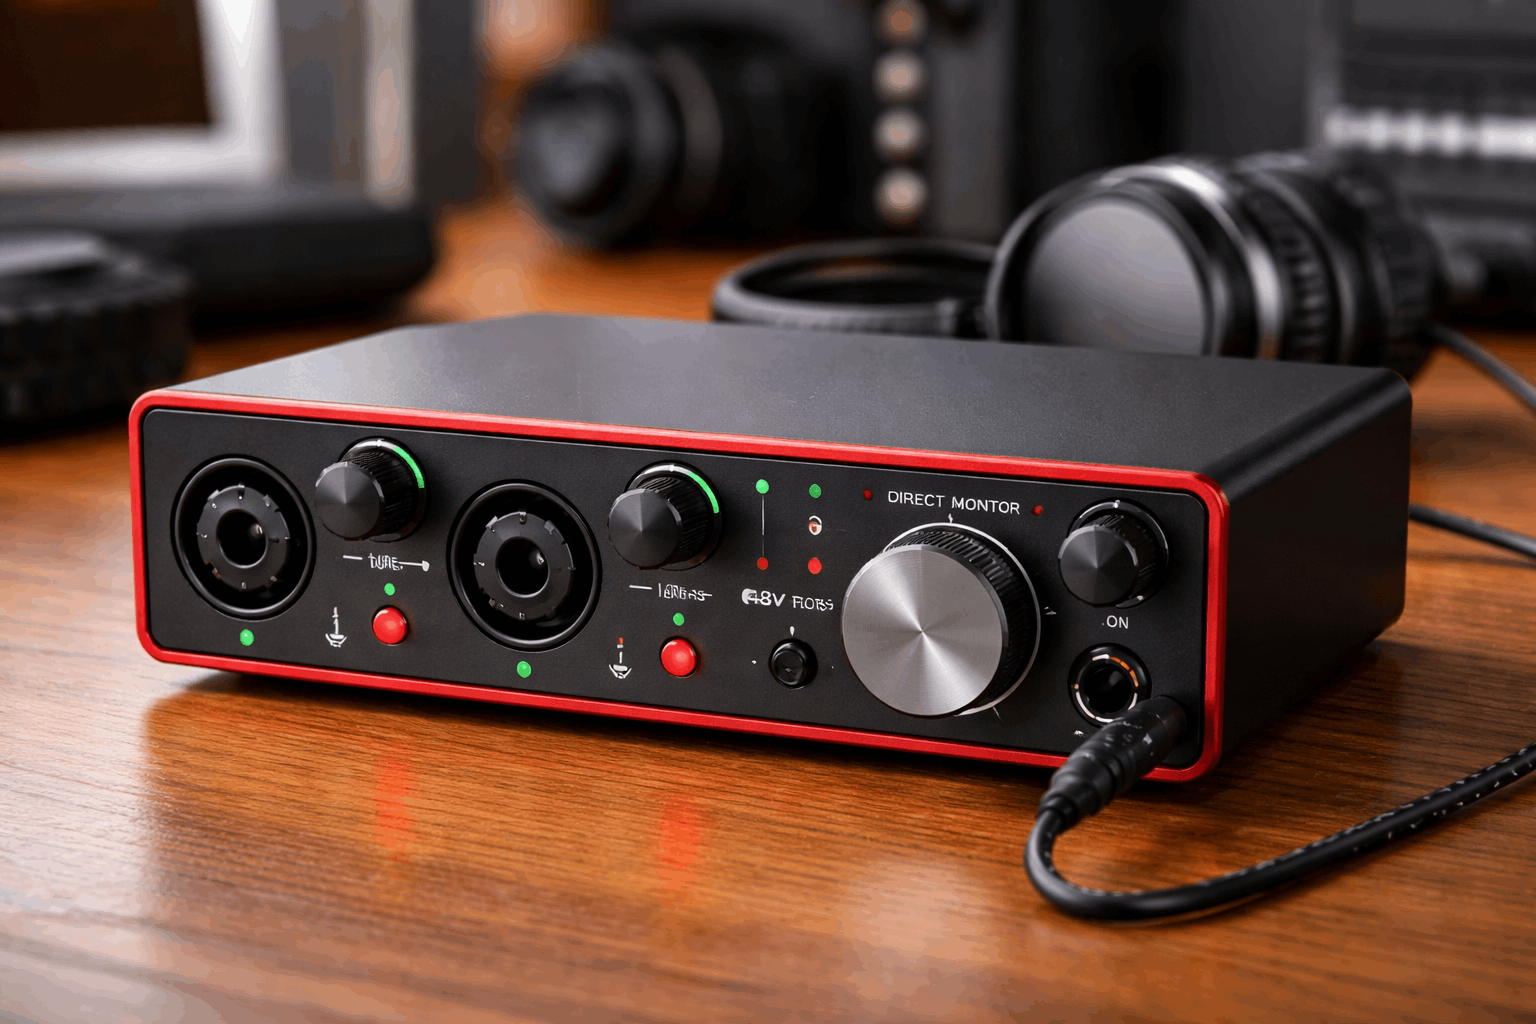
An audio interface is a small box that connects your microphones and other audio gear to your computer, usually through USB or USB-C.
It converts sound from your mic into a digital signal your computer can record, and it converts audio from your computer back into sound.
If you’ve been using a USB microphone, you already have a “mini interface” built into the mic.
A separate interface becomes useful when you want to use XLR microphones, record more than one source, or gain better control over levels.
What It Does in a Beginner Setup
For everyday creators, an interface usually solves five practical problems:
- Cleaner mic connection (especially XLR). XLR mics are common in home recording because they’re reliable, reject noise well, and work with a wide range of stands and accessories.
- More gain control. Interfaces give you a physical gain knob so you can set voice levels quickly without hunting through software menus.
- Phantom power for condenser mics. Many condenser microphones need 48V phantom power, which most interfaces can supply with a button.
- Headphone monitoring with low delay. Interfaces can let you hear your voice in real time, which helps you avoid clipping, popping, or being too quiet.
- Better upgrade path. Once you own an interface, you can swap microphones, add a second mic later, or connect instruments.
Key Terms You’ll See (In Plain Language)
Mic Preamps and Gain
A microphone produces a small signal. The interface boosts it using a preamplifier. The gain knob controls how much boost is applied.
For beginners, the goal is simple: set gain so your normal speaking voice is strong and clear without hitting the red “clip” indicator.
Phantom Power (48V)
If you’re using a condenser microphone, you’ll likely need phantom power. Dynamic mics usually do not need it.
The interface provides it through the XLR cable when you press the 48V switch.
Sample Rate and Bit Depth
These are recording quality settings. Beginners can keep it basic:
48 kHz sample rate is a common standard for video. 24-bit is a safe choice because it gives you more headroom when setting levels.
You do not need extreme settings to get good audio. Mic placement and room sound matter more.
Latency
Latency is the tiny delay between speaking and hearing yourself.
Interfaces reduce latency and often provide direct monitoring, which lets you hear your mic before it goes through the computer.
Inputs and Outputs: What to Look For
How Many Microphones Do You Need?
Most everyday creators can start with:
1 XLR input for solo videos, voiceovers, or streaming.
2 XLR inputs if you plan to record interviews, a two-person podcast, or two mics for different angles.
If you only ever record one person, paying extra for four inputs is usually unnecessary.
Headphone Output
A solid headphone output matters more than many beginners expect.
You want enough volume to hear background hiss, hum, and mouth noise so you can fix problems early.
Instrument Input (Hi-Z)
If you record guitar or bass directly, look for a Hi-Z switch or an instrument input. If you only record voice, it’s nice to have, but not essential.
Balanced Outputs (Optional)
If you might add studio monitors later, balanced outputs (often 1/4-inch TRS) are helpful. For a simple desk setup, headphones alone are fine.
How It Fits With the Rest of a Home Creator Setup
A home recording setup is usually a combination of sound, camera, light, and stability:
- Microphone: Your mic choice and placement decide most of your final sound.
- Audio interface: This becomes the control center for gain, headphone monitoring, and XLR compatibility.
- Webcam or camera: Video can look sharp, but viewers will still leave if audio is harsh or echoey.
- Lighting: A simple key light reduces noise in your image and makes basic webcams look better.
- Tripod or desk mount: Keeps framing consistent so you can focus on performance instead of fixing the shot.
An interface is not a substitute for good mic technique. If your mic is far away or your room is echoey, the interface will record that clearly too.
Common Beginner Mistakes (And How to Avoid Them)
Setting Gain Too High
If the clip light flashes, your audio may distort. Aim for a strong signal that stays out of the red.
If you need more volume, speak closer to the mic and use proper mic positioning.
Ignoring Room Sound
Interfaces capture detail. If your room is reflective, you may hear an echo.
Soft furnishings, a rug, curtains, and moving the mic closer can help more than any gear upgrade.
Using the Wrong Mic Type for the Space
A sensitive condenser mic can sound great, but it can also pick up more room noise.
Many creators choose a dynamic mic for untreated rooms because it can be more forgiving at close distances.
Monitoring Too Late
Use headphones while testing. You’ll catch hum, buzzing from a cable, or a fan noise before you record a full take.
Buying Checklist: What to Prioritize
When comparing interfaces, focus on practical needs:
- At least one XLR input (two if you expect interviews).
- 48V phantom power if you’ll use a condenser mic.
- A direct monitoring option.
- A solid headphone output.
Simple, clear controls you will actually use.
The best beginner choice is usually the one that fits your recording routine, not the one with the longest feature list.
Conclusion
Audio interfaces help beginners get cleaner recordings, better control, and a smoother path from simple setups to more serious projects.
Once your mic placement and room sound are under control, an interface becomes a reliable hub.
If your goal is better sound for everyday content, start with one or two inputs, learn gain and monitoring, and build from there.


